How to Set a Proxy in Windows PowerShell (Step-by-Step)

Sep 22, 2026 · Guides · 15 min read
The supplied environment record is Windows 10, Windows PowerShell 5.1.19041.6456 (PSEdition: Desktop), with CLR 4.0.30319.42000. This identifies the documented Windows PowerShell 5.1 environment.
If you want PowerShell requests to go through a proxy, the most direct method is to pass -Proxy to Invoke-WebRequest; add -ProxyCredential when a username and password are required. This only affects that single request — it does not require you to change the network settings for the whole machine first.
The real source of errors is mixing up proxy layers: a browser being able to connect doesn’t mean a script is using the same exit path, and netsh reporting that a proxy is set doesn’t mean Invoke-WebRequest is necessarily reading it. This article first walks through one authenticated HTTPS request, then covers session defaults, environment variables, and Windows proxy settings, and finally explains how to verify and roll back the configuration.
Which Method Should You Choose for Windows PowerShell Set Proxy
First confirm whether you’re running Windows PowerShell 5.1 or a separately installed PowerShell 7. Windows Terminal is just a terminal window — different shell versions can run inside it, so you can’t tell the version from the window’s appearance. In your current PowerShell window, run:
$PSVersionTable
Get-Command Invoke-WebRequest |
    Format-List Name, Version, Source
Windows PowerShell 5.1 usually shows Desktop, while PowerShell 7 shows Core. In 5.1, Platform may be empty — that doesn’t mean the command failed. Methods One and Two below use parameters common to both versions; the environment-variable approach is for PowerShell 7 only.
| Your need | Preferred approach | Actual scope |
|---|---|---|
| Route a single web/API request through a proxy | Method 1 – -Proxy |
This one web-cmdlet request |
| Repeated web-cmdlet calls in the same window | Method 2 – Parameter defaults | Specified cmdlets in the current session |
| A newly started PowerShell 7 process reads the proxy | Method 3 – Environment variables | Processes and clients that read these variables |
| Configure the proxy for the current user’s desktop apps | Method 4 – Windows Settings | Apps that follow this setting |
| Manage services that use the WinHTTP default configuration | Method 5 – netsh winhttp |
Components that read the WinHTTP configuration |
Pick whichever of these methods fits your need — you don’t need to run all of them. A plain -Proxy request doesn’t require administrator rights; changing the machine-level WinHTTP configuration should be done by an administrator with the appropriate permissions.
How to Choose and Prepare a Rola IP Proxy for PowerShell
A proxy service provides the connection resource; the PowerShell parameters route the request to it. First get the actual host, port, protocol, and authentication details delivered by Rola IP, then write the request — don’t treat the official website’s domain as the proxy server, and don’t guess a port from some other tutorial.
For Fixed-Exit Tasks, Prioritize Static Residential Proxies
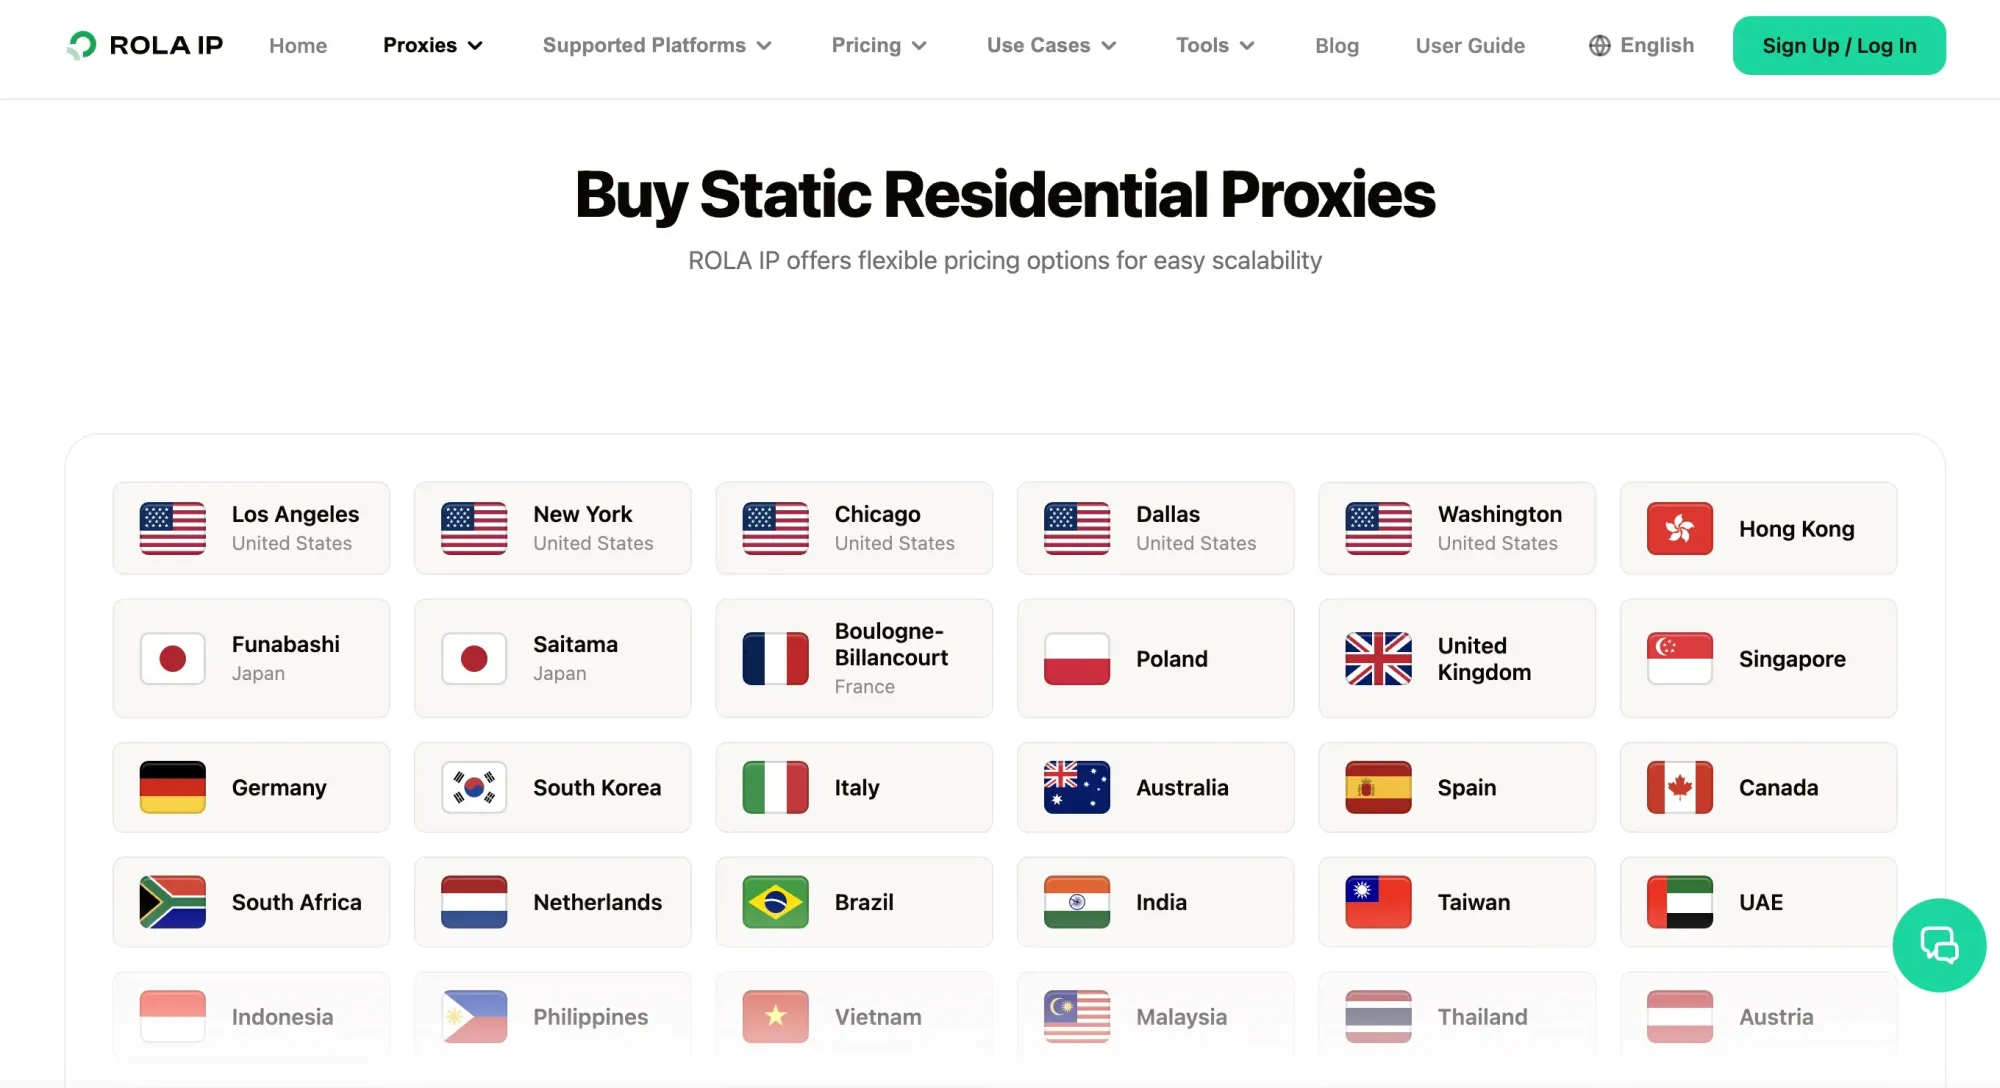
If a script connects to the same business endpoint over a long period, or the receiving party requires a registered fixed source IP, it’s worth evaluating Rola IP’s static residential proxies. The product page states that these plans use per-IP billing and include unlimited traffic within the validity period; confirm the current plan terms before purchase. A dedicated IP reduces interference from sharing resources with other customers, and a fixed exit makes maintaining an allowlist easier. What the receiving party needs to register should be the actual exit IP — not the proxy gateway’s host address.
For Multi-Region Tasks, Choose Dynamic Residential Resources as Needed
For approved regional content checks and business testing, Rola IP’s dynamic residential proxy page describes country/city targeting, traffic-based plans, sub-account traffic allocation, and sticky sessions. Confirm the current options in the Rola IP documentation and account before configuring a job. Dynamic resources should not be treated as a fixed-IP allowlist solution.
Rola IP plans may expose HTTP and/or SOCKS5 endpoints; use the protocol and port shown in your account or the current documentation. Client compatibility also depends on the PowerShell and .NET runtime version. To accommodate both Windows PowerShell 5.1 and PowerShell 7, the main workflow in this article uses an HTTP proxy to connect to an HTTPS target. When authenticating with a username and password, use an interactive credential object; when using an IP allowlist, follow the authorization rules of the product you purchased. Plans and available regions depend on actual delivery.
Check These Four Details Before You Start
| Detail | How to fill it in | Common mistakes |
|---|---|---|
| Host | The server name or IP given in the console | Using the official website address or the target site’s address |
| Port | The port that matches the protocol | Using the SOCKS5 port for HTTP |
| Protocol | This article’s main workflow uses HTTP | Changing the proxy protocol to HTTPS just because the target is HTTPS |
| Authentication | The proxy username/password, or an allowlist permitted by the product | Using the website password or your Rola login password instead of the proxy password |
An HTTP proxy can forward HTTPS traffic via CONNECT, and TLS verification of the target page’s certificate is still preserved. However, the HTTP proxy hop itself provides no TLS protection, and some proxy-authentication methods may transmit recoverable credentials over that hop — use this only on a trusted network and with an access method the provider endorses. Writing https:// for the target address does not mean the proxy address must also be written as https://.
Method 1 – How to Set a Proxy for a Single Request with Invoke-WebRequest
How to Paste Commands and View the Results
If you’re not comfortable with the command window, you can use the interface-based approach below on a machine that has Windows PowerShell ISE. ISE is built for Windows PowerShell and does not run PowerShell 7; Method 3 in this article still needs to be run in PowerShell 7. If you’re already comfortable with a terminal, you can skip straight to the proxy-address step.
- Search for Windows PowerShell ISE in the Start menu and open it.
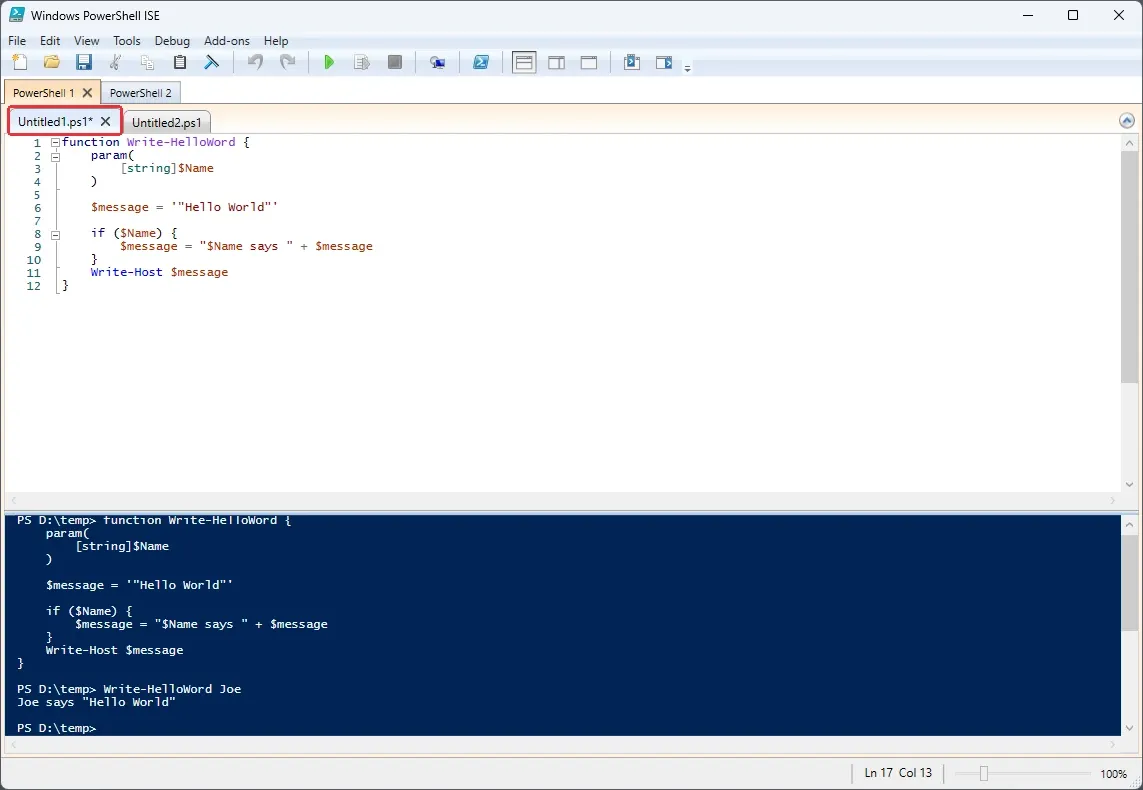
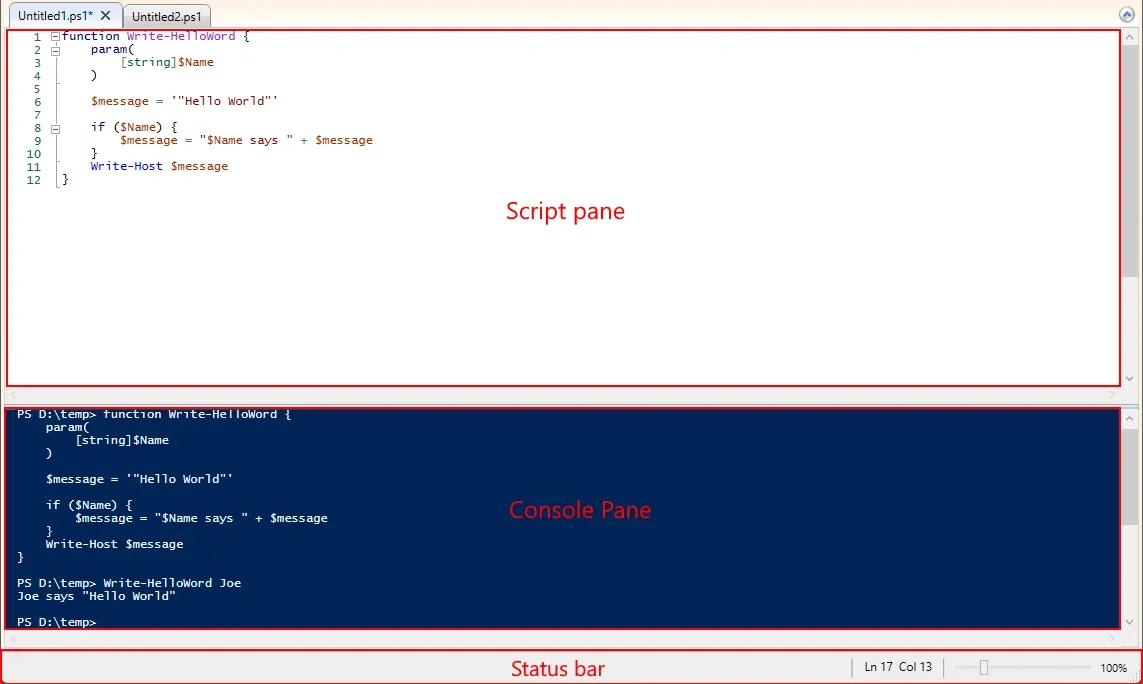
- Select the complete block of code you want to run, then click Run Selection on the toolbar. Execute only one step at a time, and keep working in the same PowerShell session so that variables saved in an earlier step aren’t lost.

- Check the prompts and output in the blue Console Pane below. If there’s an input prompt, complete it first; if an error appears, investigate before moving to the next step. Once the proxy check succeeds, verify the
StatusCodeandExitIPin this article’s code output — don’t just treat the window opening as proof that the proxy worked.
Step 1 – Enter the Proxy Address
Open a PowerShell window and run the following code in order. When prompted, enter the actual HTTP proxy address provided by Rola IP, in the form http://host:port. Do not include a username or password in the address.
$ProxyUri = [uri](Read-Host 'HTTP proxy URL (no credentials)')
if (-not $ProxyUri.IsAbsoluteUri -or
    $ProxyUri.Scheme -ne 'http' -or
    -not [string]::IsNullOrEmpty($ProxyUri.UserInfo)) {
    throw 'Enter http://host:port without credentials.'
}
Here, -Proxy specifies the proxy server to connect through, while -Uri specifies the actual site being accessed. Use the variable name $ProxyUri — don’t use $Host, since that’s a built-in PowerShell variable and shouldn’t be overwritten as an ordinary host-name variable.
Step 2 – Enter Proxy Authentication Details
$ProxyCredential = Get-Credential -Message 'Proxy credentials'
Enter the proxy account and password at the prompt. Depending on the host and version, the input UI may be a popup dialog or a terminal prompt. Get-Credential returns a PSCredential object — avoid hard-coding a real password into a script or into your command history. Don’t output that object’s password in plain text, and don’t write the credential object into a public log.
Step 3 – Send an HTTPS Exit-Check Request
$Request = @{
    Uri             = 'https://api.ipify.org?format=json'
    Proxy           = $ProxyUri
    ProxyCredential = $ProxyCredential
    UseBasicParsing = $true
    TimeoutSec      = 30
    ErrorAction     = 'Stop'
}
$Response = Invoke-WebRequest @Request
$Result = $Response.Content | ConvertFrom-Json
[pscustomobject]@{
    StatusCode = [int]$Response.StatusCode
    ExitIP     = $Result.ip
}
This uses ipify’s HTTPS JSON endpoint; a normal response includes an ip field. A StatusCode of 200 means this particular check request succeeded, and ExitIP is the exit for that request — it is neither the proxy credential nor necessarily the same as the gateway address you entered. Redact the full exit IP before sharing any screenshots.
UseBasicParsing keeps Windows PowerShell 5.1 from doing full webpage parsing; it’s kept in newer PowerShell versions for compatibility. Microsoft has documented Windows PowerShell 5.1’s webpage-parsing security notice — readers shouldn’t be told to dismiss the warning or enable unnecessary page-script parsing just to keep a request going.
If you’re using a product-supported IP allowlist and don’t need username/password authentication, run the following line before sending the request to remove the credential parameter, then call the request again:
$Request.Remove('ProxyCredential')
$Response = Invoke-WebRequest @Request
If the proxy’s authentication rules require both a username/password and an allowlist match, don’t remove the credential. The allowlist should contain the actual public source address the client uses when connecting to the proxy — not the proxy exit you’re hoping for.
Step 4 – Read JSON Directly with Invoke-RestMethod
If you only need the JSON data, you can reuse the parameters above and switch to Invoke-RestMethod. It converts the response into an object, so you don’t need to call ConvertFrom-Json again.
$Result = Invoke-RestMethod @Request
$Result.ip
Invoke-RestMethod is well suited to processing API data; Invoke-WebRequest makes it more convenient to check the status, response headers, and raw body at the same time. Don’t call ConvertFrom-Json again on an object that Invoke-RestMethod has already parsed.
Method 2 – How to Set a Default Proxy for the Current PowerShell Session
If you need to send repeated requests in the same window, you can use $PSDefaultParameterValues. It supplies default parameters for the commands you specify — it is not a global Windows network switch.
Step 1 – Save the Existing Defaults and Set the Proxy
Finish entering the address and credentials from Method 1 first, then run:
$SavedDefaults = $PSDefaultParameterValues.Clone()
$PSDefaultParameterValues['Invoke-WebRequest:Proxy'] = $ProxyUri
$PSDefaultParameterValues['Invoke-RestMethod:Proxy'] = $ProxyUri
$PSDefaultParameterValues['Invoke-WebRequest:ProxyCredential'] =
    $ProxyCredential
$PSDefaultParameterValues['Invoke-RestMethod:ProxyCredential'] =
    $ProxyCredential
The version above is for username/password authentication. For allowlist-based access without a password, just set the two Proxy entries and skip ProxyCredential. Use the full cmdlet name so it’s easy to review — avoid an overly broad wildcard rule that might match other commands.
Step 2 – Verify Again Without Passing the Proxy Parameter
$Check = Invoke-RestMethod `
    -Uri 'https://api.ipify.org?format=json' `
    -TimeoutSec 30 -ErrorAction Stop
$Check.ip
An explicitly passed parameter overrides the corresponding default. A newly started PowerShell process does not automatically inherit the defaults set in this window; a scheduled task should also configure this explicitly in its task script rather than assuming it inherits the interactive window’s state.
Step 3 – Restore the Defaults When You’re Done
$PSDefaultParameterValues = $SavedDefaults
Remove-Variable SavedDefaults
Save once and restore once within the same window. Don’t just Clear the whole defaults dictionary, since that could delete settings unrelated to the proxy. Don’t write the password into $PROFILE; unattended tasks should use an organization-approved secret store and read it under the task’s actual run identity.
Method 3 – How to Set Proxy for PowerShell 7 via Environment Variables
PowerShell 7 web cmdlets can use proxy environment variables when the installed PowerShell/.NET runtime supports this behavior; Windows PowerShell 5.1 should not use this approach. The variables are read by the underlying client, and HttpClient’s default proxy rules also involve initialization timing, so the safest way to test this is to set the variables in the parent window, then start a new PowerShell 7 process. Verify the exact behavior for the PowerShell 7 and .NET versions installed on the machine.
Step 1 – Save and Set the Variables in the Parent Window
This example is for connections that don’t need an interactive proxy password, such as an already-authorized allowlist connection. If you need a username/password, prefer Method 1 instead, to avoid putting a password into an environment variable.
$ProxyUri = [uri](Read-Host 'HTTP proxy URL (no credentials)')
if (-not $ProxyUri.IsAbsoluteUri -or
    $ProxyUri.Scheme -ne 'http' -or $ProxyUri.UserInfo) {
    throw 'Enter http://host:port without credentials.'
}
$ProxyEnvNames = 'HTTP_PROXY','HTTPS_PROXY','ALL_PROXY','NO_PROXY'
$SavedProxyEnv = @{}
foreach ($Name in $ProxyEnvNames) {
    $SavedProxyEnv[$Name] =
        [Environment]::GetEnvironmentVariable($Name, 'Process')
}
$env:HTTP_PROXY = $ProxyUri.AbsoluteUri
$env:HTTPS_PROXY = $ProxyUri.AbsoluteUri
Remove-Item Env:ALL_PROXY -ErrorAction SilentlyContinue
$env:NO_PROXY = 'localhost,127.0.0.1'
pwsh -NoProfile
After running the last line, you’ll be in a new PowerShell 7 child process. If it says pwsh isn’t found, PowerShell 7 isn’t on the current PATH — install it per Microsoft’s installation guide and reopen the terminal, or go back to Method 1.
HTTPS_PROXY means “which proxy to use when reaching an HTTPS target,” so its value can be an http:// proxy address. NO_PROXY is comma-separated — it is not the semicolon-separated list used in Windows Settings, and you shouldn’t directly reuse a wildcard pattern like *.example.com from elsewhere.
Step 2 – Test in the Child Process
$Check = Invoke-RestMethod `
    -Uri 'https://api.ipify.org?format=json' `
    -TimeoutSec 30 -ErrorAction Stop
$Check.ip
Just changing the variables and then reusing an already-established old session object can cause confusing results. Don’t mix in Method 2’s default parameters within this child process either — verify the environment-variable approach on its own first.
Step 3 – Exit the Child Process and Restore the Parent Window
Type exit in the child process to return to the parent window where you saved the variables, then run:
foreach ($Name in $ProxyEnvNames) {
    [Environment]::SetEnvironmentVariable(
        $Name, $SavedProxyEnv[$Name], 'Process')
}
Remove-Variable SavedProxyEnv, ProxyEnvNames
This restores the process-level variables only — it doesn’t touch any persistent User- or Machine-level settings. Environment-variable scope and the Windows system proxy are different mechanisms; if things are still off after reopening the terminal, check them separately.
Method 4 – How to Open Windows Proxy Settings from PowerShell
If, beyond scripts, you also need to configure apps that follow the Windows user proxy setting, you can go to the system’s proxy page. Don’t edit the registry directly just to make one Invoke-WebRequest call work — app caches, auto-configuration scripts, and organizational policy can all affect the outcome.
Step 1 – Open the Proxy Settings Page
In PowerShell on Windows 10 or Windows 11, run:
Start-Process 'ms-settings:network-proxy'
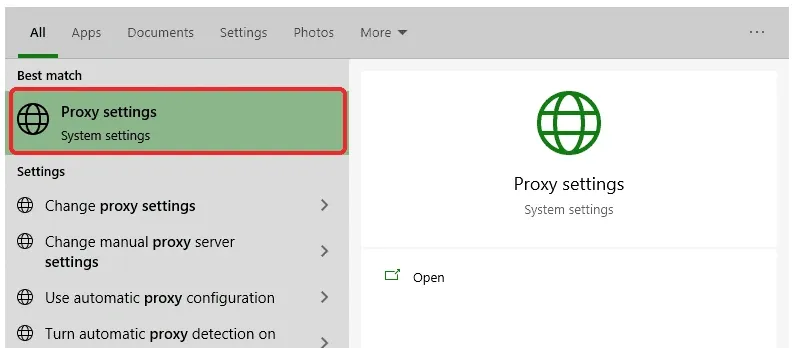
You can also search for “Proxy settings” in the Start menu and open the system settings result. The screenshot below shows the Windows 10 interface; Windows 11’s button layout is somewhat different. For Windows 11 screenshots and instructions on entering your Rola IP proxy details, browser authentication, and checking the exit IP, follow our Windows 11 proxy settings guide.
Step 2 – Fill in the Manual Proxy and Save
On Windows 10, turn on Use a proxy server under Manual proxy setup; on Windows 11, click the corresponding Set up or Edit first. Enter the host in Address, the port in Port, and only list addresses that truly need to bypass the proxy under the bypass list, then click Save. Don’t concatenate a username and password into the address field.
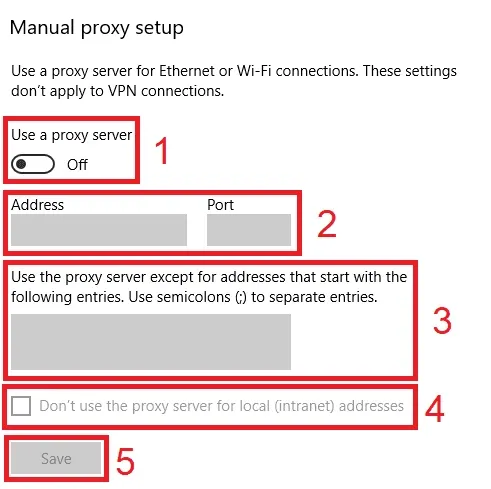
The image source is the same as above. In the screenshot the toggle is off, so the input fields and Save button aren’t yet active — turn the toggle on first, then fill in the real configuration. The system settings page usually has no general-purpose proxy password field; authentication is handled by whichever app uses the proxy. If a script needs explicit credentials, still use Method 1.
Step 3 – Verify and Restore in the Actual App
After saving, verify inside the app that actually needs the proxy. Clients that follow the user setting, apps that use their own network settings, and the WinHTTP service may all take different paths — don’t use a browser check as a substitute for a script check. See Microsoft’s Windows proxy guide for detailed interface instructions.
When you stop testing the proxy, restore the toggle, address, and auto-configuration state you recorded earlier; on a device that originally used a company PAC script, don’t simply turn off all proxy options. Turning off only the manual proxy doesn’t mean auto-configuration or a VPN has also been stopped.
Method 5 – How to Set a WinHTTP Proxy in PowerShell
Only use this method when the target program explicitly uses the WinHTTP default configuration. netsh winhttp is not a universal proxy switch for Invoke-WebRequest, and it doesn’t put a proxy layer in front of all software on Windows.
Step 1 – View and Back Up the Existing Configuration
Run this in a Windows administrator PowerShell window with the right permissions. Read the configuration first, then save a backup — don’t start with a reset.
netsh winhttp show proxy
$BackupFile = Join-Path $env:TEMP (
    'winhttp-{0}.txt' -f (Get-Date -Format 'yyyyMMdd-HHmmss'))
netsh winhttp dump | Set-Content -LiteralPath $BackupFile
$BackupFile
Keep the backup path that’s displayed, and check that the file actually contains configuration commands. The backup may contain internal proxy addresses, so store it somewhere access-controlled. If the device uses advanced policy or auto-configuration, an administrator should confirm the backup covers whatever needs to be restored.
Step 2 – Set the Server and Review
$ProxyAddress = Read-Host 'Proxy host:port (no scheme or password)'
netsh winhttp set proxy proxy-server="$ProxyAddress"
if ($LASTEXITCODE -ne 0) {
    throw 'WinHTTP proxy update failed.'
}
netsh winhttp show proxy
What you enter here is host:port, not the full proxy URI used in Method 1. A successful command only means the WinHTTP configuration has been written — next, run the target service’s actual operation or check its logs. A proxy that needs a username and password still has to be supported by the target program’s own authentication — netsh set proxy can’t generically store a set of proxy credentials.
Step 3 – Import or Restore the Previous Configuration When Needed
If an administrator explicitly requires importing the current user’s related proxy configuration into WinHTTP, you can run the following command; this is not meant to be a toggle for keeping two configurations in sync long-term.
netsh winhttp import proxy source=ie
To restore the earlier backup, run this in the same window where you saved $BackupFile:
netsh exec "$BackupFile"
netsh winhttp show proxy
Only use netsh winhttp reset proxy if the original state was a direct connection and you’re confirming you want to restore a direct connection — it’s a reset, not “undo the last step.” See Microsoft’s netsh winhttp documentation for the full syntax.
How to Verify That a PowerShell Proxy Is Working and Locate Errors
First, Distinguish Port Reachability from Request Success
On Windows, you can first check whether the proxy host’s TCP port is reachable. The example below reuses $ProxyUri saved from Method 1 and doesn’t involve a password:
Test-NetConnection -ComputerName $ProxyUri.DnsSafeHost `
    -Port $ProxyUri.Port -InformationLevel Detailed
Test-NetConnection’s TcpTestSucceeded only reflects the TCP connection result — it doesn’t verify proxy authentication, the HTTPS tunnel, or permission on the target site. A failed ping can’t substitute for a TCP port check either. If the current PowerShell 7 session can’t load this Windows module, you can run the check in Windows PowerShell 5.1 instead.
Then Confirm the Exit and Request Path
In a new PowerShell 7 window, you can use -NoProxy on a single request as a comparison, provided organizational policy allows a direct connection. It skips the web cmdlet’s proxy selection, but it cannot disable a device VPN or a transparent network gateway.
$Baseline = Invoke-RestMethod `
    -Uri 'https://api.ipify.org?format=json' `
    -NoProxy -TimeoutSec 30 -ErrorAction Stop
$Baseline.ip
This parameter doesn’t apply to Windows PowerShell 5.1. When comparing with Method 1’s result, a different IP means the two requests had different exits; the same IP could still involve the same upstream NAT, a bypass rule, or an unchanged path — it isn’t enough on its own to conclude the proxy has failed. The ipify example checks IPv4 only, so it can’t be used to claim that all IPv6 traffic takes the same path.
Fix by Error Type Instead of Retrying Repeatedly
| Symptom | Check first | Don’t do this |
|---|---|---|
| 407 Proxy Authentication Required | Proxy username/password, allowlist, product balance and permissions | Treating -Credential as the proxy-authentication parameter |
| Connection refused or timed out | Host, port, firewall, whether the protocol matches | Unlimited retries or randomly switching ports |
| TLS or certificate error | System time, trust chain, whether the enterprise inspection proxy supports TLS | Disabling certificate validation as a routine fix |
| 403 or 429 | Target’s response body, access permissions, terms of service and rate limits | Assuming it must be a password error or immediately rotating IPs |
| Works in the browser but fails in the script | The proxy source and authentication method for each | Assuming the Windows global proxy already covers the script |
| Returns HTML but JSON can’t be parsed | Whether it’s a login page, a gateway error page, or a block page | Only fixing the JSON-parsing code |
Proxy authentication uses -ProxyCredential; -Credential authenticates against the target service. If the enterprise proxy genuinely supports the current Windows identity, you can use -ProxyUseDefaultCredentials, but it cannot be passed together with -ProxyCredential. An ordinary Rola IP username/password is not the same as Windows domain identity — the main workflow here still uses an explicit credential. See the official Invoke-WebRequest documentation for the parameter definitions.
Don’t print the full request object, the proxy password, or auth headers into logs. When you need help from Rola IP support, providing the time, PowerShell version, protocol used, error type, and redacted connection details is enough — mask any secrets in public forum posts and support-ticket screenshots too.
Summary
The key to Windows PowerShell set proxy is choosing the right scope. Start with -Proxy and -ProxyCredential to complete one clearly defined HTTPS request, then extend to session defaults or PowerShell 7 environment variables as needed; only change the Windows user proxy or WinHTTP when a desktop app or service itself requires it. Rola IP’s static resources suit fixed exits and long-term budgeting, while its dynamic resources suit approved tasks with regional requirements. Saving the original configuration, verifying the actual exit, and keeping a restore path is what turns “set up” into a maintainable connection.