
How to Build an MCP Server with Python: v2 Tutorial

Aug 27, 2026 · Guides · 7 min read
TL;DR
To build an MCP server, install the official v2 Python SDK, create an MCPServer instance, decorate a typed Python function with @mcp.tool(), then test the tool before connecting it to an MCP host. Start with stdio for a local server; use Streamable HTTP only when you need a deployed endpoint and have added authentication, authorization, logging, and network controls.
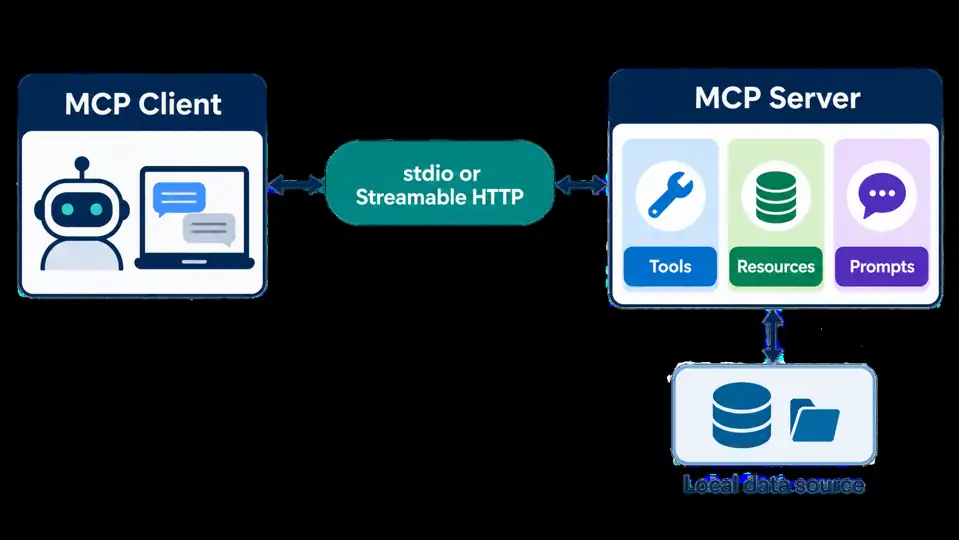
What an MCP Server Does
MCP is a protocol for connecting an AI application to external context and capabilities. A server can expose three core primitives:
| Primitive | Use it for | First-server advice |
|---|---|---|
| Tool | An action or calculation with inputs | Start here; make input and output types explicit. |
| Resource | Readable context identified by a URI | Add it for stable reference data. |
| Prompt | A reusable message template | Add it only when the client benefits from a guided interaction. |
The protocol is not a permission system. A tool can still do harm if it accepts arbitrary shell commands, unrestricted URLs, or over-broad credentials. Design the capability boundary before the function body. For example, a get_project_note(topic) tool is easier to review than a generic run_any_request(url) tool.
The official Python SDK documents stdio as the default local transport and Streamable HTTP as the transport for an HTTP deployment. It also notes that SSE is retained for compatibility but is not the recommended choice for new servers. See the official SDK running guide for current transport behavior.
Prerequisites and Verified v2 Environment
This walkthrough targets Python 3.10+ on macOS, Linux, or Windows PowerShell. The commands use a virtual environment so the project dependency stays isolated. The Inspector flow also requires Node.js and npx on your PATH.
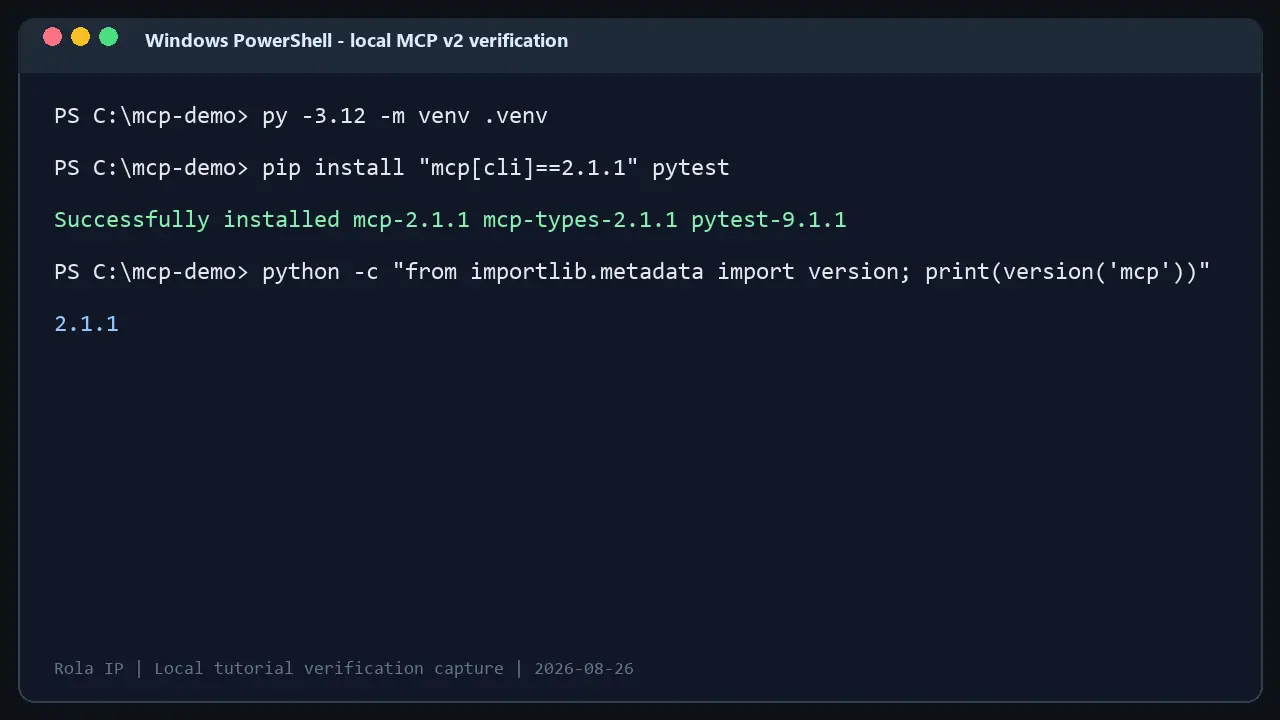
Test evidence (2026-08-26): the server and in-memory pytest test in this tutorial were run on Windows with Python 3.12.13, mcp==2.1.1, and pytest==9.1.1; the result was 1 passed.
| Requirement | Current choice | Why it matters |
|---|---|---|
| Python | 3.10 or later | This is the v2 SDK’s documented minimum. |
| SDK | mcp[cli]==2.1.1 |
Pins the current stable v2 line used by this tutorial. |
| Transport | stdio |
Lowest-friction local integration. |
| Test target | In-memory client | Verifies the tool without opening a port. |
| Inspector | Node.js plus npx |
Required by mcp dev to launch the Inspector. |
The official documentation describes v2 as the current stable release line. v1 remains a maintenance line for projects that are not ready to migrate. This tutorial deliberately uses v2 end to end: its imports, client test, Inspector command, and documentation links all target the same major version. The v2 installation guide is the source of truth when you update the pin.
| Decision | v2 tutorial path | v1 maintenance path |
|---|---|---|
| Server import | from mcp.server import MCPServer |
Use the v1.x branch documentation and APIs. |
| Test import | from mcp import Client |
Do not copy v2 test imports into a v1 project. |
| Documentation | py.sdk.modelcontextprotocol.io current docs |
Versioned v1.x documentation only. |
| Recommendation for a new project | Use v2 | Use only when migration is not yet feasible. |
Create the environment:
py -3.11 -m venv .venv
.\.venv\Scripts\Activate.ps1
python -m pip install --upgrade pip
pip install "mcp[cli]==2.1.1" pytest
For macOS or Linux, activate with source .venv/bin/activate. Confirm the installed package before copying a version-sensitive snippet:
mcp version
If mcp version is unavailable in your environment, use python -c "from importlib.metadata import version; print(version('mcp'))" to confirm the installed package version.
Step 1: Define a Narrow, Typed Tool
Create server.py. The tool below reads from an in-memory allowlist so it has no credentials, external requests, or file-system side effects. A real implementation can replace the dictionary with an approved service adapter after you define authorization and audit requirements.
from mcp.server import MCPServer

mcp = MCPServer("Project Notes")

NOTES = {
    "release": "Release checklist: tests, changelog, and rollback owner.",
    "security": "Security checklist: least privilege, secret rotation, and audit logs.",
}


@mcp.tool()
def get_project_note(topic: str) -> dict[str, str]:
    """Return an approved project note for a known topic."""
    key = topic.strip().lower()
    if key not in NOTES:
        return {
            "status": "not_found",
            "message": "Use one of: release, security.",
        }
    return {"status": "ok", "topic": key, "note": NOTES[key]}


if __name__ == "__main__":
    mcp.run()
Why this design works:
- The function signature creates a clear input schema for the client.
- The return value is structured JSON, not an ambiguous text blob.
- The server limits accepted topics instead of forwarding arbitrary input to another system.
mcp.run()defaults tostdio, which suits a local host that launches the process.
When people ask how to build an mcp server, the code is only half the task. The other half is deciding what the tool is allowed to do. Keep credentials on the server side, never in a tool description or response, and map each tool to a least-privilege service account.
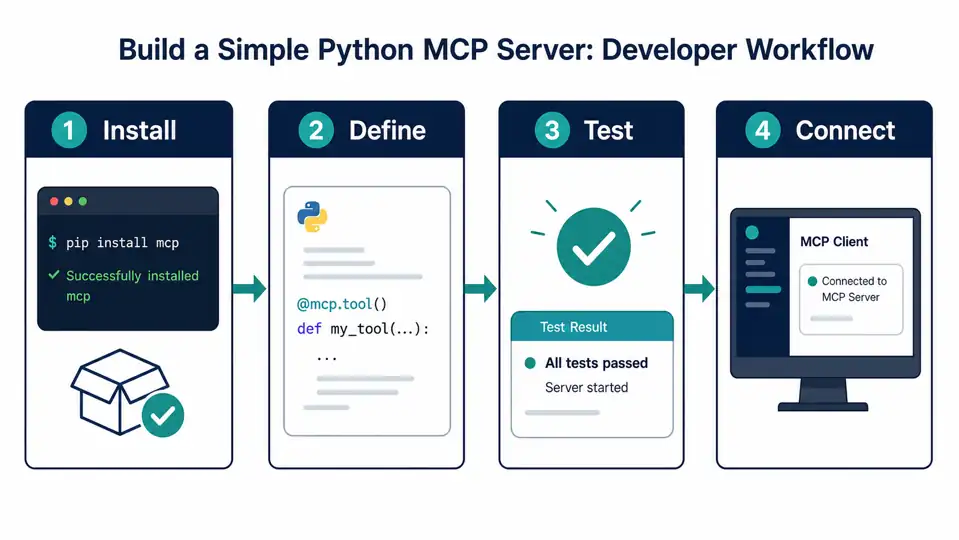
Step 2: Test the Server Before Connecting a Host
The SDK documentation recommends an in-memory client for server tests. This is valuable because it verifies the registered tool and structured response without subprocess configuration, ports, or a desktop host.
Create test_server.py next to server.py:
import pytest
from mcp import Client

from server import mcp


@pytest.mark.anyio
async def test_get_project_note() -> None:
    async with Client(mcp, raise_exceptions=True) as client:
        result = await client.call_tool("get_project_note", {"topic": "release"})

    assert result.structured_content == {
        "status": "ok",
        "topic": "release",
        "note": "Release checklist: tests, changelog, and rollback owner.",
    }
Install the test dependency and run it:
pip install pytest
pytest -q
Expected output:
1 passed
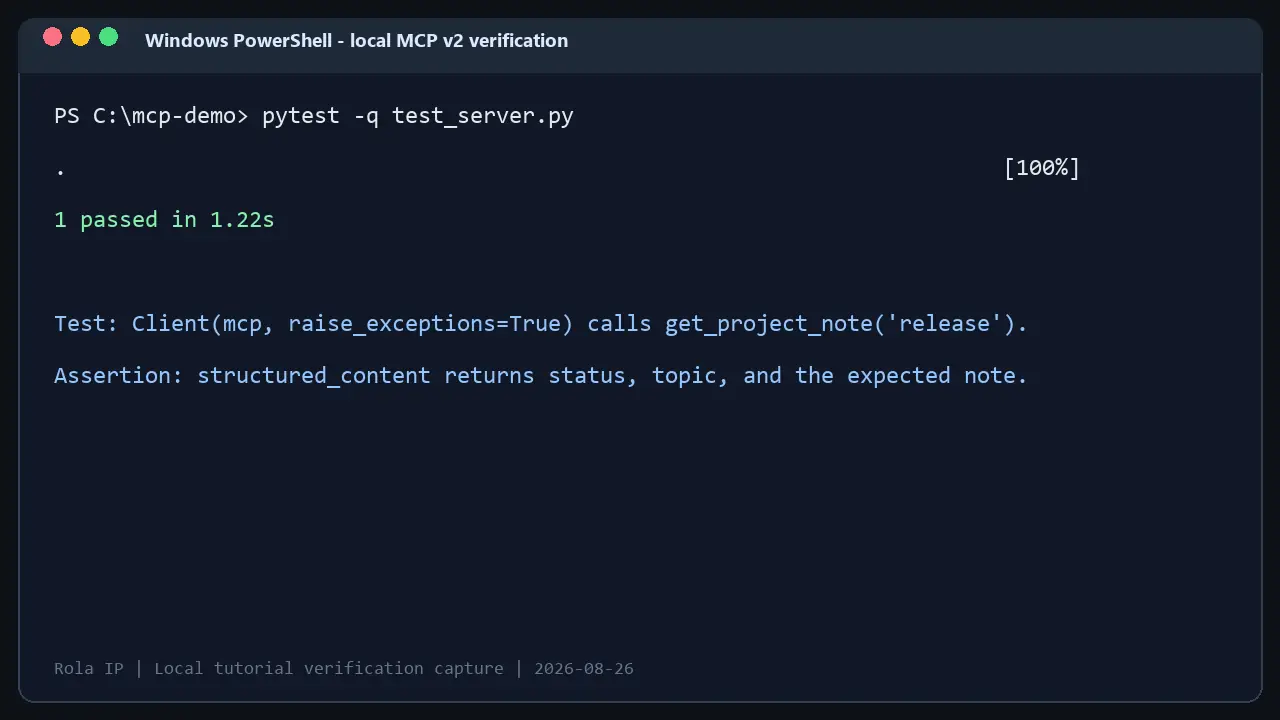
This test shape follows the v2 SDK’s current getting-started guidance: Client(mcp) connects directly to the server object, so you validate behavior before involving a transport. Keep the SDK pin, imports, and official v2 testing documentation aligned whenever you update the project.
Step 3: Run Locally and Inspect It
For manual development, use the Inspector instead of running a stdio server alone. The Inspector launches the server as a subprocess and connects over stdio; it requires Node.js and npx on your PATH.
# With uv installed:
uv run mcp dev server.py

# Or, after installing the [cli] extra into the active virtual environment:
mcp dev server.py
Open the URL printed by the Inspector, select Tools, call get_project_note with release, and verify that the structured result contains status: ok. Running python server.py directly is useful only to confirm that a stdio server stays alive awaiting client input; it does not open the Inspector. Keep standard output reserved for the protocol. Send diagnostics to standard error or the SDK logging facilities.
Use a tool name, description, input type, and return type that explain the permission boundary. A host should be able to tell what get_project_note can retrieve without executing it. Avoid a catch-all tool named query, fetch, or execute unless its allowlists, ownership checks, and rate limits are independently enforced.
Step 4: Choose stdio or Streamable HTTP
Choose the transport from the deployment boundary, not from convenience alone.
| Situation | Better starting choice | Extra controls |
|---|---|---|
| One developer and a local desktop host | stdio |
Process path review; no secrets in config. |
| Internal service behind a gateway | Streamable HTTP | TLS, token validation, authorization, logs, request limits. |
| Existing ASGI application | Mount a Streamable HTTP server | Route isolation, lifecycle tests, and observability. |
| Older client that only supports SSE | Compatibility-only SSE | Plan a migration; do not choose it for a new build. |
For a deployed server, treat MCP as an application API. Authenticate the caller, authorize each tool and object, validate inputs, limit output size, record audit events, and rotate credentials. The SDK’s authentication section describes resource-server support and token verification concepts, but it is still your responsibility to implement a verifier and an access policy suitable for your environment.
Adding an Approved External Data Tool
Do not make a first MCP server scrape arbitrary sites. If you later add a tool that calls an external API or reads public web content, document the data owner, authorized purpose, input allowlist, timeout, and stop conditions. A 401, 403, or 429 is a signal to stop and review access, not something to work around.
For permitted location-sensitive QA or public-data workflows, you might route an approved outbound request through a controlled network configuration. Review proxy networks and Python proxy integration before implementation, and keep the proxy credential outside model-visible prompts. If a project genuinely requires regional verification, a residential proxy can be evaluated for authorized use under the target service’s terms; it is not a bypass mechanism for access controls or rate limits.
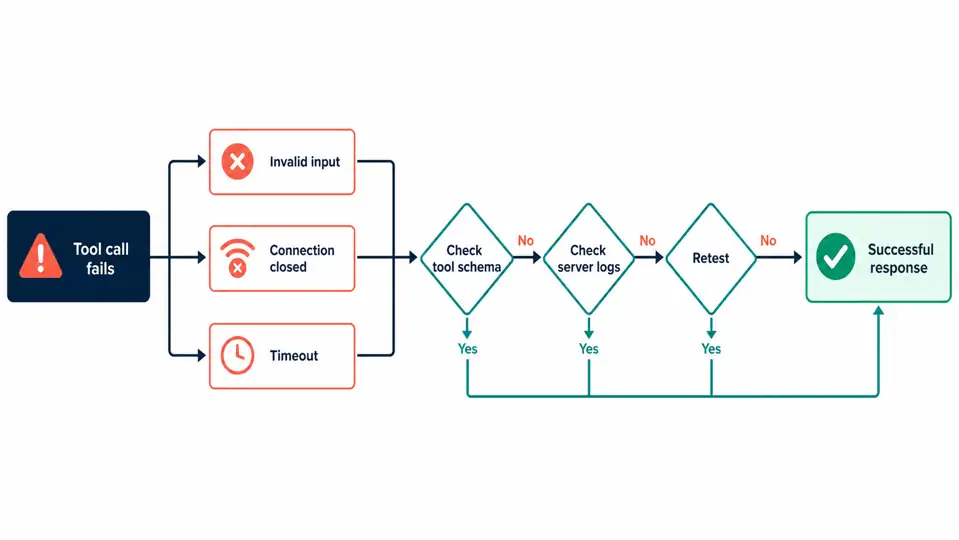
Common Failures and How to Verify Them
| Symptom | Likely cause | How to verify | Safe fix |
|---|---|---|---|
| Tool is missing | Decorator or import was not loaded | Inspect the tool list in your test or inspector | Import the module once and use @mcp.tool(). |
| Input is rejected | Schema and client arguments differ | Compare the function type hint with the call payload | Use explicit scalar or model fields; add a failing test. |
| Client disconnects | stdio output was polluted or process exited |
Check stderr and remove stdout prints | Use logging to stderr; run the server directly once. |
| HTTP call times out | Route, gateway, or upstream dependency is unhealthy | Check server logs and a bounded health endpoint | Set timeouts, return a clear error, and retry only when authorized. |
| Tool returns too much data | Output is unbounded | Measure response size in a test | Paginate, summarize, or return a resource URI. |
Production Checklist
Before exposing the server beyond your workstation, answer these questions in writing:
- Which people, clients, and service accounts may call each tool?
- Which records, domains, commands, or query parameters are allowed?
- Does each external action have a timeout, output limit, and audit event?
- Can the model cause a side effect without an explicit user confirmation?
- Can you revoke a credential or disable a tool without redeploying the client?
Rola IP can fit naturally into a server that supports approved data workflows, but it should remain an implementation detail guarded by configuration and policy. Start with the Rola IP documentation when a controlled, authorized outbound connection is actually part of the tool’s job.