Proxy Server on iPhone: Setup, Test, and Fix Issues

Aug 18, 2026 · Guides · 6 min read
TL;DR
You can configure a proxy server on iPhone from the settings of a connected Wi-Fi network. For a manual setup, you need a proxy hostname or IP address, a port, and, when required, a username and password. No extra app is needed for a standard HTTP proxy.
This guide shows how to enter those details, confirm that the proxy is working, and diagnose common connection failures. It also explains when the built-in iPhone settings are not enough, such as when you need SOCKS5, cellular-data routing, or device-wide enterprise control.
Important: The built-in proxy setting is saved per Wi-Fi network. It does not automatically follow the iPhone to another Wi-Fi network or cellular data.
What You Need Before Configuring the iPhone Proxy
Get the following values from your proxy provider or network administrator:
| Setting | What to enter | Example |
|---|---|---|
| Server | Proxy hostname or IP address | proxy.example.com |
| Port | The provider-assigned proxy port | 12345 |
| Authentication | Enable it if the proxy requires credentials | On |
| Username | Proxy account or generated username | demo-country-us |
| Password | Proxy password | your_proxy_password |
The Server field accepts a hostname or IP address. Do not paste a complete proxy URL such as http://user:pass@host:port into that field. Split it into the Server, Port, Username, and Password boxes.
If you use Rola IP, its proxy quick start explains where to copy the host, port, username, and password. Start with the simplest working username before adding country, city, rotation, or sticky-session parameters.
How to Set Up a Proxy Server on iPhone
The following steps use the built-in manual HTTP proxy configuration in current iOS versions.
1. Open the Connected Wi-Fi Network
- Open Settings.
- Tap Wi-Fi.
- Confirm that the iPhone is connected to the network you want to configure.
- Tap the blue Info button beside that network.
The proxy belongs to this Wi-Fi profile. If you later connect to a different network, repeat the setup for that network.
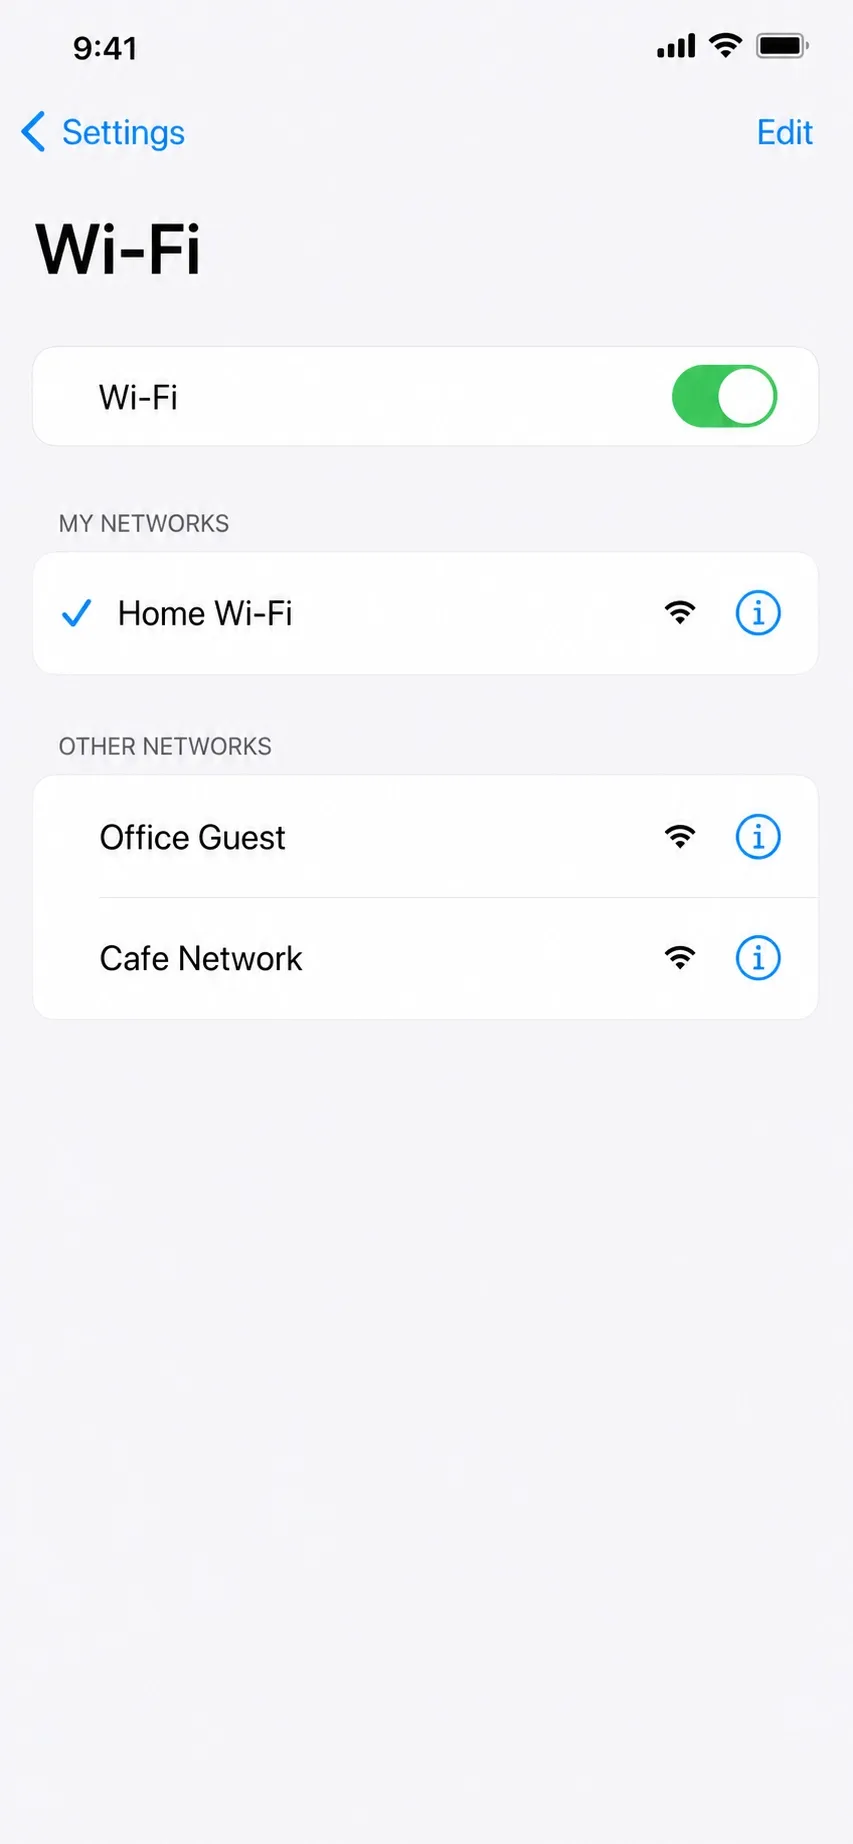
Figure 1. Open the details for the connected Wi-Fi network. Original current-iOS interface illustration; network names are fictional.
2. Open the HTTP Proxy Settings
Scroll to the bottom of the network details screen. Under HTTP Proxy, tap Configure Proxy.
You should see three choices:
- Off: Sends traffic without this Wi-Fi proxy.
- Manual: Accepts a server, port, and optional authentication credentials.
- Automatic: Accepts a proxy auto-configuration, or PAC, URL.
Choose Manual when your provider gives you individual connection details.
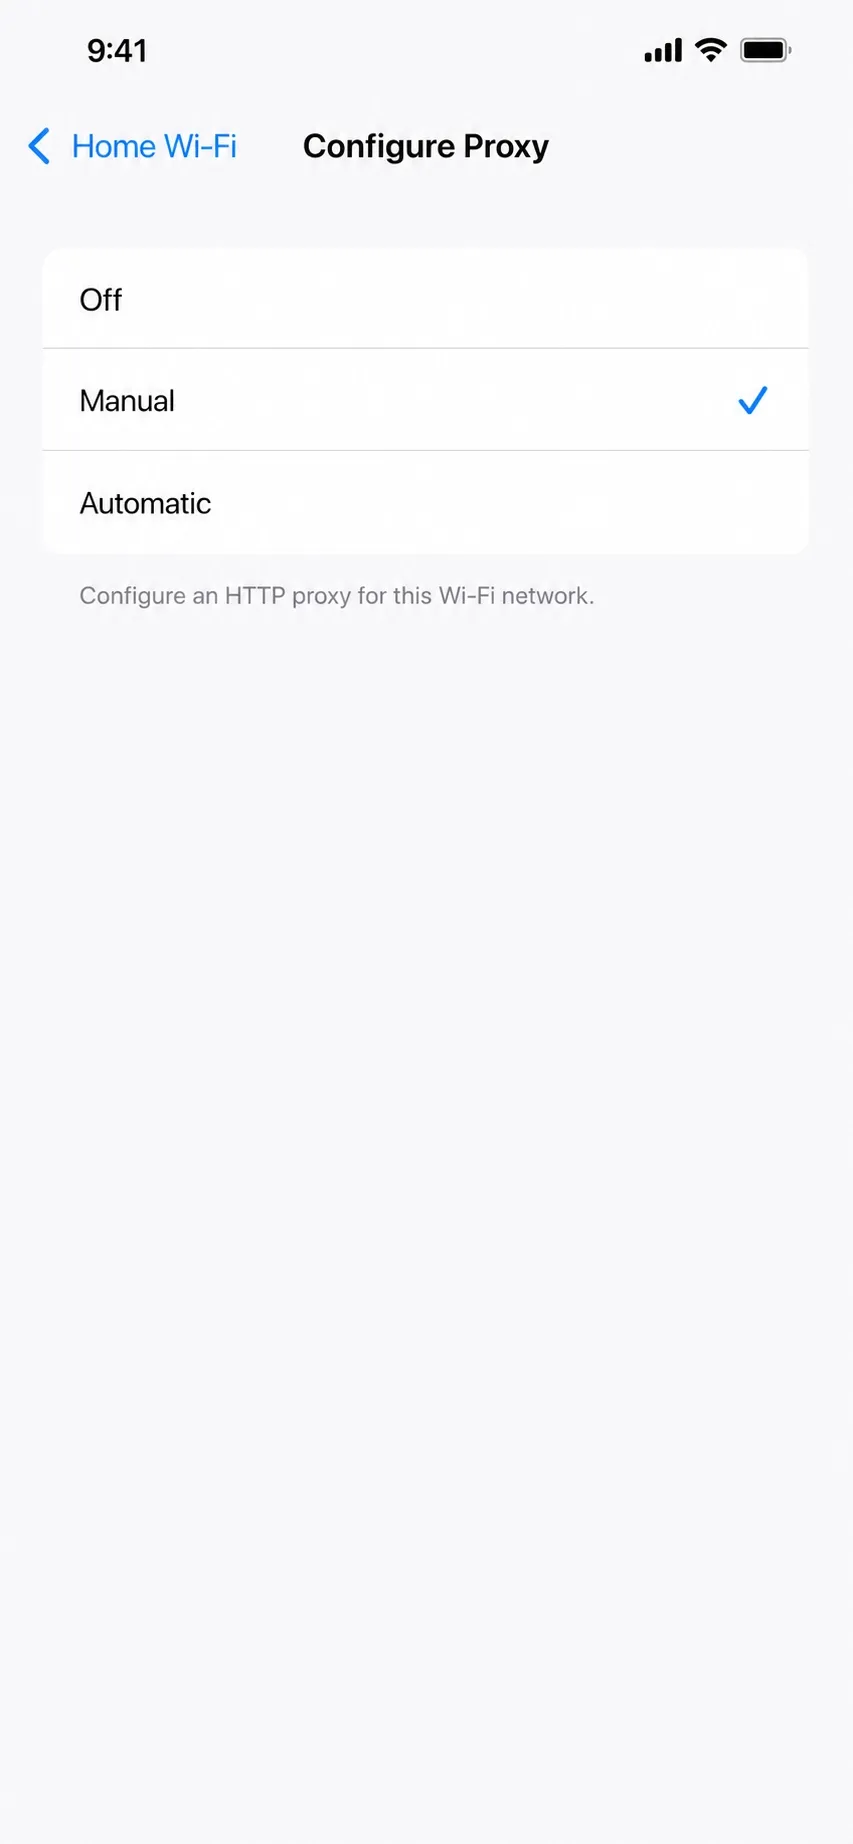
Figure 2. Select Manual for a provider-issued hostname, port, and login. Original current-iOS interface illustration.
3. Enter the Server, Port, and Credentials
- In Server, enter the proxy hostname or IP address.
- In Port, enter the assigned port number.
- Turn on Authentication if the provider uses username and password access.
- Enter the proxy username and password exactly as issued.
- Tap Save.
Do not add spaces before or after any value. Proxy usernames are often case-sensitive and may contain routing parameters. A single missing character can change the requested location or cause authentication to fail.
For Rola IP’s app-based setup and account-routing options, see the iOS proxy setup instructions. Rola IP supports username and password authentication and can include location or session controls in the generated username.
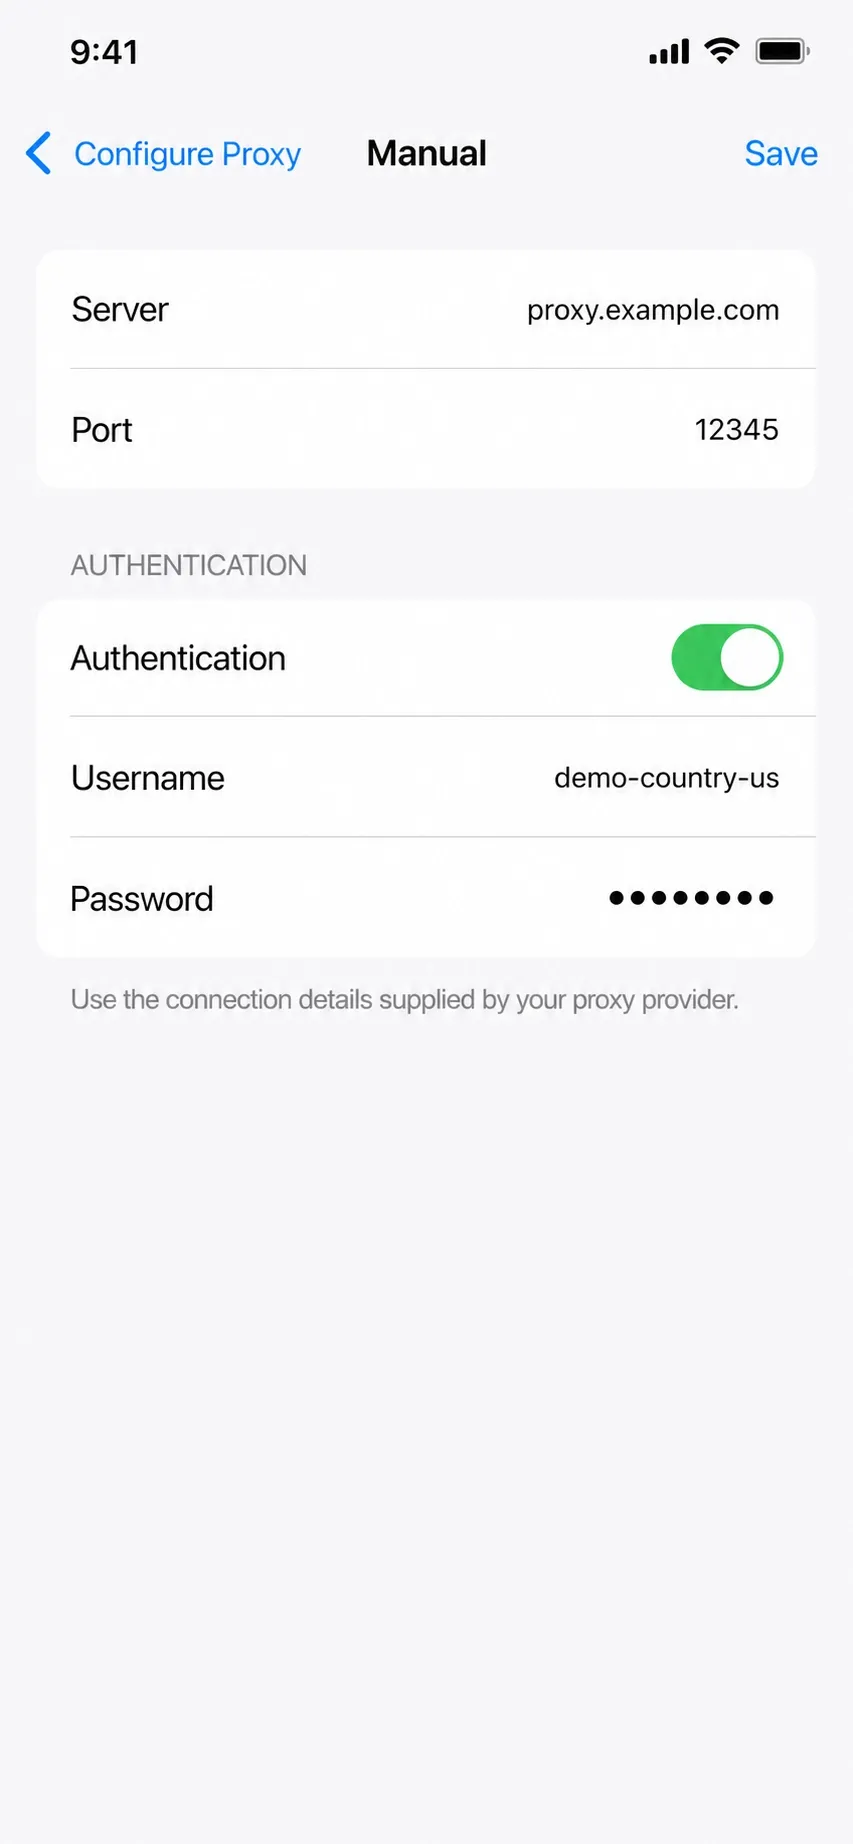
Figure 3. Enter the server, port, and credentials. Original current-iOS interface illustration with fictional values.
4. Test the Proxy Connection
Open Safari and visit an IP-check page. Compare the displayed public IP and location with the connection you had before enabling the proxy.
A successful result should meet all three checks:
- Safari can load a webpage.
- The public IP differs from the iPhone’s normal connection IP.
- The reported country or city matches the proxy location you requested.
Do not rely on one cached page. Refresh the IP result, then open a second website to confirm that normal browsing works through the same route.
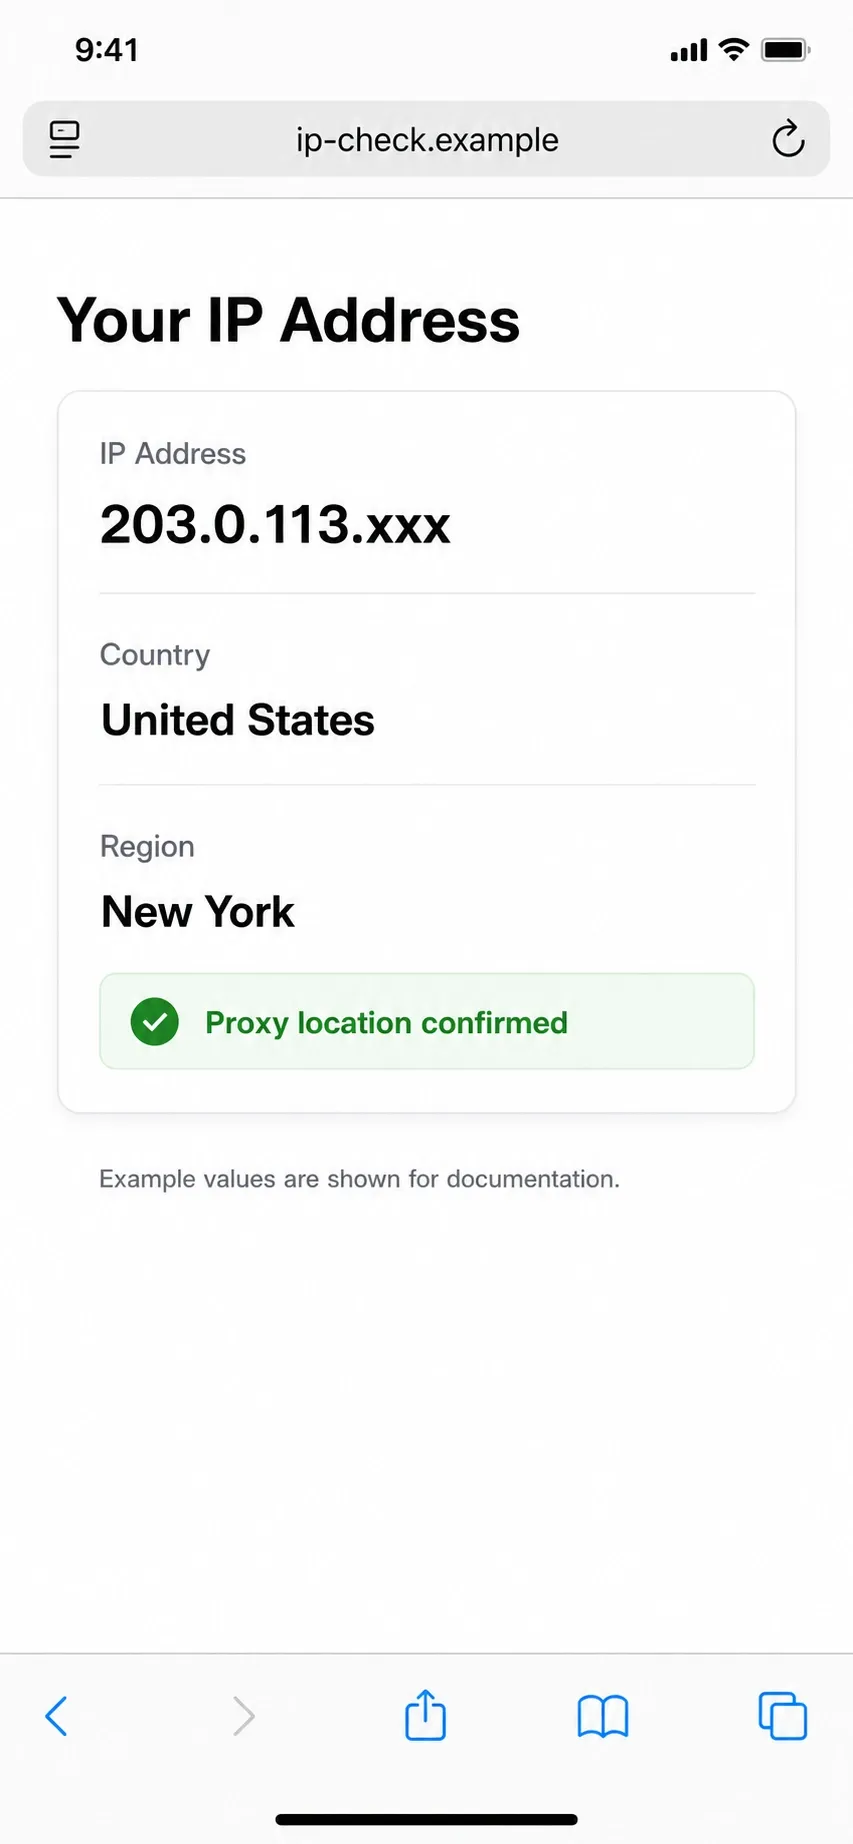
Figure 4. Confirm the exit IP and location. Original current-iOS interface illustration using a documentation-reserved IP range.
Manual, Automatic, App-Based, or Managed Proxy?
The correct method depends on the protocol and how broadly you need to route traffic.
| Method | Best for | Main limitation |
|---|---|---|
| Manual HTTP proxy | One Wi-Fi network and a provider-issued host, port, and login | Does not apply to cellular data or every app and protocol |
| Automatic PAC URL | Organization-defined routing rules and proxy exceptions | Requires a valid PAC file at a reachable URL |
| Proxy or VPN-style app | SOCKS5 or broader traffic routing | Requires a trusted third-party app and its configuration |
| MDM Global HTTP Proxy | Supervised enterprise or school devices | Requires device management and supervision |
The native Wi-Fi screen exposes HTTP proxy settings, not a direct SOCKS5 field. If your endpoint is SOCKS5-only, use a compatible, trusted client rather than entering SOCKS5 details as though they were HTTP. Apple also notes that some apps use non-HTTP connections and can bypass an HTTP proxy.
For location-sensitive browsing or testing, a residential proxy provides an exit IP associated with a residential network. A mobile proxy server uses carrier-assigned mobile IP space. Connecting from an iPhone does not automatically make the exit IP mobile. The selected proxy network determines the exit-IP type.
How to Use an Automatic Proxy Configuration URL
Use this method only if your administrator or provider gives you a PAC URL.
- Go to Settings > Wi-Fi.
- Tap the Info button beside the connected network.
- Tap Configure Proxy.
- Select Automatic.
- Paste the full PAC URL into the URL field.
- Tap Save, then test the public IP and required websites.
A PAC file can send selected destinations through a proxy while allowing others to connect directly. If the URL is unreachable or the script is invalid, routing may fail or differ from the administrator’s intended policy.
Fix a Proxy Server That Is Not Working on iPhone
| Symptom | Likely cause | How to verify | How to fix |
|---|---|---|---|
| Safari cannot connect | Wrong server, port, or unavailable endpoint | Compare every field with the provider dashboard | Recopy the hostname and port, then try a newly generated endpoint |
| Authentication prompt repeats | Incorrect credentials or wrong authentication mode | Regenerate credentials or test them in a supported client | Enable Authentication and enter the exact login values |
| Internet works but the IP does not change | Proxy is off, the wrong Wi-Fi is active, or traffic bypasses the proxy | Reopen Configure Proxy and check the current network | Select Manual, save again, and retest in Safari |
| Safari works but another app fails | The app uses another protocol or ignores the Wi-Fi proxy | Compare the same destination in Safari and the app | Use an app-compatible routing method or managed solution |
| Proxy stops after leaving Wi-Fi | The native setting is tied to one network profile | Check whether the phone is using Wi-Fi or cellular data | Reconnect to the configured Wi-Fi or use an approved broader-routing client |
| Requested location is wrong | The username has a missing or incorrect location parameter | Compare the generated username with the IP-check result | Generate credentials for the intended country or city |
| Public Wi-Fi login page does not open | The captive portal is being sent through the proxy | Temporarily set Configure Proxy to Off | Complete Wi-Fi sign-in, then re-enable the proxy |
Isolate Other Routing Features
Avoid testing several network-routing tools at the same time. If a VPN or another proxy app is active, disconnect it temporarily and test the Wi-Fi proxy again. When diagnosing Safari, also account for iCloud Private Relay if it is enabled for that connection.
This is a temporary isolation test, not a recommendation to disable privacy features permanently. Test one routing layer at a time so the observed public IP has a clear cause.
Recreate the Wi-Fi Connection
If the values are correct but the connection remains stuck:
- Set Configure Proxy to Off and save.
- Toggle Wi-Fi off and back on.
- Reconnect to the network.
- Re-enter the proxy details.
- Test with Safari before opening other apps.
If that still fails, test a second proxy endpoint. This separates an iPhone configuration problem from an unavailable or blocked server.
How to Turn Off a Proxy Server on iPhone
- Open Settings > Wi-Fi.
- Tap the Info button beside the connected network.
- Scroll to HTTP Proxy and tap Configure Proxy.
- Select Off.
- Tap Save.
Turning the proxy off does not cancel the proxy service. It only stops that Wi-Fi network from using the saved route.
Final Checks
A working iPhone proxy setup has four parts: the correct Wi-Fi network, the correct server and port, valid authentication, and a changed public IP that matches the expected location. The native manual method is the fastest option for an HTTP proxy on one Wi-Fi network. Use PAC, a trusted client, or device management only when your routing scope or protocol requires it.