Python Requests Proxy: Rola IP Setup, Auth & Rotation (2026)

Sep 10, 2026 · Guides · 17 min read
The most reliable way to use a proxy in Python Requests is to assemble the host, port, username, and password generated by Rola IP into a proxy URL, then explicitly pass it to your request through the proxies parameter, while also configuring timeouts, session reuse, and controlled retries.
This approach suits public web data collection with a web scraping proxy, regional result verification, proxies for price monitoring, and API network testing. It solves problems around exit IP, geographic location, session stability, and connection management — it doesn’t automatically handle login authorization, JavaScript rendering, CAPTCHAs, or target-site permission. Before you start, confirm the target site’s terms, robots.txt, the scope of your data authorization, and applicable law.

Figure 1: Rola IP’s English Residential Proxies product page, which you can use to confirm network type and available capability.
TL;DR: How Should You Configure a Python Requests Proxy?
The clearest, most debuggable configuration is to generate a proxy endpoint at Rola IP first, save the credentials in environment variables, then set a proxy mapping separately for http and https targets.
The minimal usable structure looks like this. The two keys here represent “the target URL’s protocol” — the value on the right is the proxy server’s connection URL. When accessing an HTTPS site, an HTTP proxy is usually still written as http://username:password@host:port, and Requests carries the HTTPS traffic through a CONNECT tunnel.
import requests

proxy_url = "http://username:password@host:port"
proxies = {
    "http": proxy_url,
    "https": proxy_url,
}

response = requests.get(
    "https://httpbin.org/ip",
    proxies=proxies,
    timeout=(10, 30),
)
response.raise_for_status()
print(response.json())
In production, don’t write a real password directly into source code. The complete examples later in this article read credentials from environment variables, encode special characters, and test both the success path and the 407 error path using a local authenticated proxy.
Understanding Proxies in Python Requests
Python Requests is responsible for constructing and sending the HTTP request, while the proxy is responsible for receiving the connection and forwarding traffic from a different network exit — only once you’ve separated these two responsibilities can you correctly judge which layer an error happened at.
What Is a Proxy for Python Requests?
A proxy for Python Requests is an intermediary endpoint that receives the client connection and sends the HTTP request onward using a different network exit.
A single request usually passes through four layers: the Python program calls Requests, Requests connects to the proxy gateway, the proxy gateway selects an exit IP, and the target site returns a response. The proxy can change the exit network and location the target site sees, but request headers, cookies, access frequency, TLS behavior, and application logic remain under the client’s control.
| Capability | Handled by Python Requests | Handled by Rola IP | Decided by the Target Site |
|---|---|---|---|
| URL, headers, cookies, body | Yes | No | Receives and validates |
| Timeouts, retries, connection pooling | Yes | No | Response speed affects the result |
| Proxy authentication and exit selection | Submits credentials and parameters | Validates and assigns an exit | Observes the exit IP |
| Whether the page allows access | No | No | Yes |
| JavaScript rendering | Not executed | Not executed | The page may depend on a browser |
If a task needs to verify public pages from different regions, choose a Rola IP residential proxy based on your business scope; if you’re only requesting the same internal API with no exit-location or network-isolation requirement, a direct connection is usually simpler.
How Do Python Requests Proxies Work?
Requests uses the proxy dictionary to match a proxy based on the target URL’s scheme — not based on whether the dictionary key itself declares the proxy to be HTTP or HTTPS.
The official Requests proxy documentation gives the basic pattern as {"http": "...", "https": "..."}. This distinction matters: if you only set the http key, requests to an https:// target may bypass the proxy; if you mistakenly write an ordinary HTTP proxy as https://, it can trigger a TLS or connection failure.
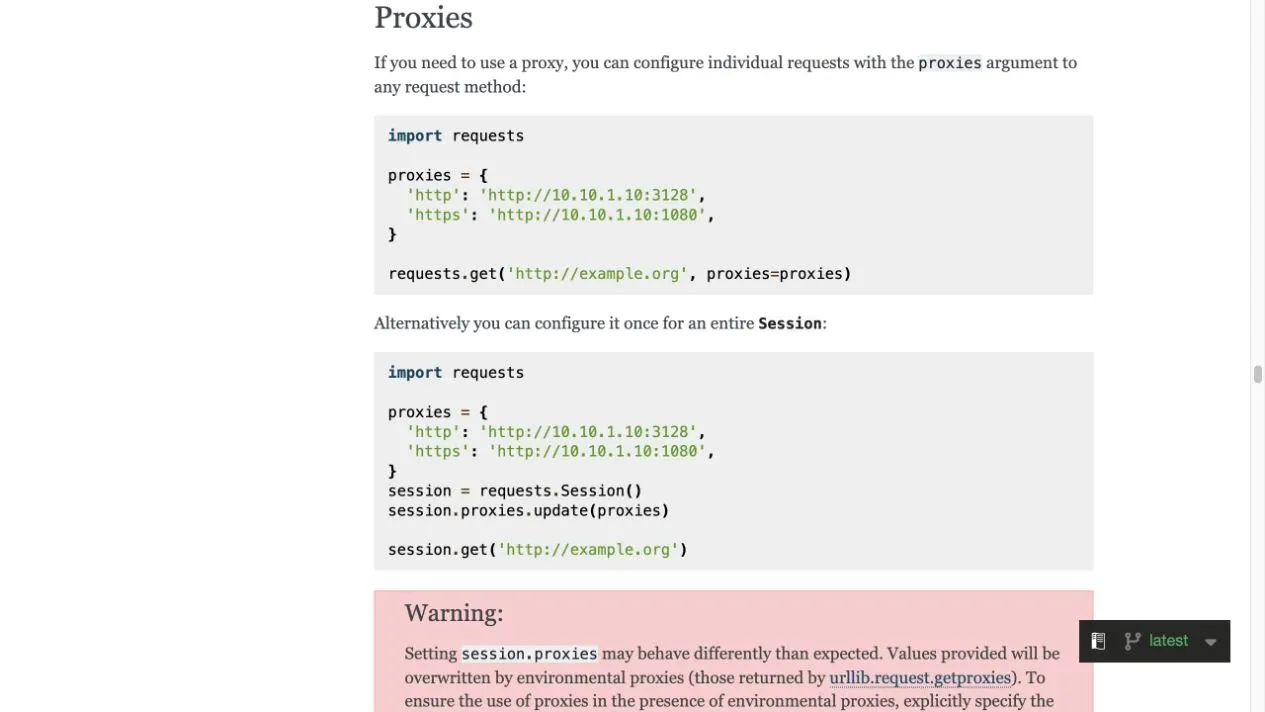
Figure 2: The official Requests Proxies documentation, explaining the proxy dictionary, environment variables, and how to configure an authenticated URL.
| Configuration | Actual Meaning | Common Result |
|---|---|---|
{"http": proxy} |
Only proxies HTTP targets | HTTPS targets may connect directly |
{"https": proxy} |
Only proxies HTTPS targets | HTTP targets may connect directly |
| Both keys point to the same URL | HTTP and HTTPS targets both go through the same gateway | Most common |
socks5h://... |
Uses SOCKS5, with DNS resolved by the proxy | Suits avoiding local DNS resolution |
A proxy isn’t a guarantee of anonymity. If the business requires verifying the network exit, also check the exit IP, country, city, or ASN in the response, and confirm the request wasn’t sent directly due to NO_PROXY, an environment-variable override, or a code branch.
Environment and Dependency Versions
This article’s examples were verified in an isolated virtual environment; pinned dependencies help reproduce request behavior and error information.
This verification used Python 3.14.0, Requests 2.34.2, urllib3 2.7.0, PySocks 1.7.1, and pytest 9.0.2. Readers can use Python 3.10 or later; if you only use an HTTP/HTTPS proxy, installing requests is enough — the SOCKS5 example needs requests[socks] installed additionally.
python3 -m venv .venv
source .venv/bin/activate
# Windows PowerShell: .venv\Scripts\Activate.ps1

python -m pip install --upgrade pip
python -m pip install "requests[socks]" pytest
python -c "import requests, urllib3; print(requests.__version__, urllib3.__version__)"
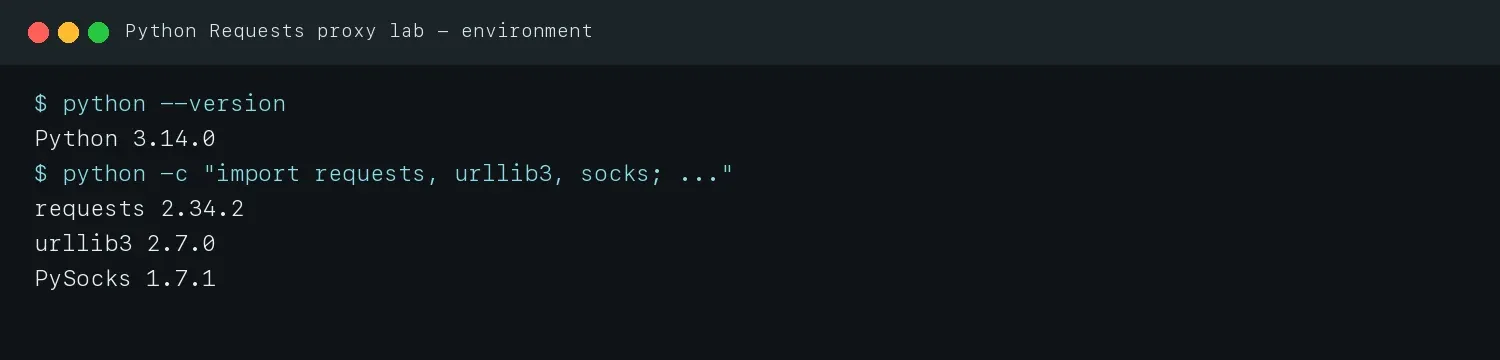
Figure 3: The actual Python, Requests, urllib3, PySocks, and pytest versions used in this run.
Python Requests Proxy Example: Basic Setup
The easiest basic setup to verify is to first request a baseline without a proxy, then request the same IP or echo endpoint using the proxy dictionary, and finally compare the two responses.
ScrapingBee’s Python Requests proxy example also uses the progressive approach of “confirm Requests works first, then build the proxy dictionary, send the request, and verify the IP.” Below, that flow is adapted into a version that fits Rola IP credentials and can be run directly.
Step 1: Send a Baseline Request Without a Proxy
The baseline request confirms that Python, DNS, the target URL, and the local network itself are all working. If this step already fails, adding a proxy will only add more variables to debug.
import requests

target_url = "https://api.ipify.org?format=json"
direct = requests.get(target_url, timeout=(10, 30))
direct.raise_for_status()
print("Direct:", direct.json())
Step 2: Create the Proxy Dictionary
Assemble the Rola IP endpoint into a proxy URL, and configure both target schemes at the same time. The placeholders below must be replaced with the actual values generated in the dashboard.
proxy_url = "http://username:password@host:port"
proxies = {
    "http": proxy_url,
    "https": proxy_url,
}
Step 3: Send the Same Request Using the Proxy
proxied = requests.get(
    target_url,
    proxies=proxies,
    timeout=(10, 30),
)
proxied.raise_for_status()
print("Proxied:", proxied.json())
Step 4: Compare the Direct and Proxied Results
For a public IP echo endpoint, the IP in Direct and Proxied should differ; for this article’s local test fixture, the response proves the second request went through the authenticated proxy via a via_proxy field.
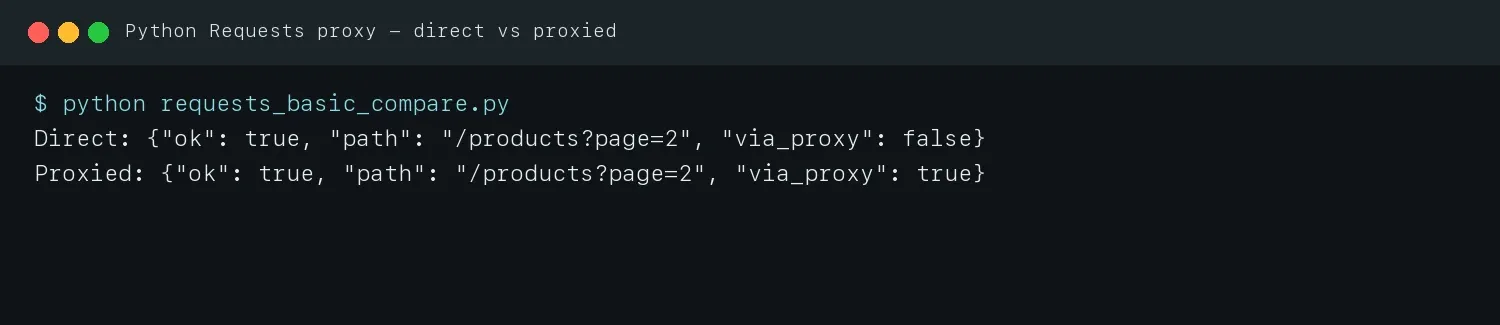
Figure 4: An actual run of the direct-versus-proxy test; the direct request shows via_proxy: false, and the proxied request shows via_proxy: true.
This screenshot verifies the code branch, proxy authentication, and forwarding behavior — it isn’t posing as a real Rola IP public exit. After running the public IP example with your own Rola IP credentials, you should also verify the exit country, city, ASN, and session strategy.
How to Set Proxy in Python Requests with Rola IP
To set up Rola IP in Python Requests, first choose the network and region, then generate an authenticated endpoint, and finally hand the endpoint to your executable script through environment variables.
Step 1: Choose the Network That Matches Your Task
Public web scraping or regional result verification usually suits rotating residential proxies; when you need to keep the same exit across consecutive requests, configure a sticky session; a fixed allowlist or a long-term consistent exit is better suited to a static network. Define the target country, city, session duration, concurrency, and expected traffic first, then choose the product — this avoids the mistake of “the proxy connects, but doesn’t meet the business requirements.”
Step 2: Generate an Endpoint in the Rola IP Dashboard
After logging into the dashboard, choose the proxy product, country or region, rotation method, and authentication method, then copy the Host, Port, Username, and Password. For the specific entry points and fields, refer to the English proxy setup guide.
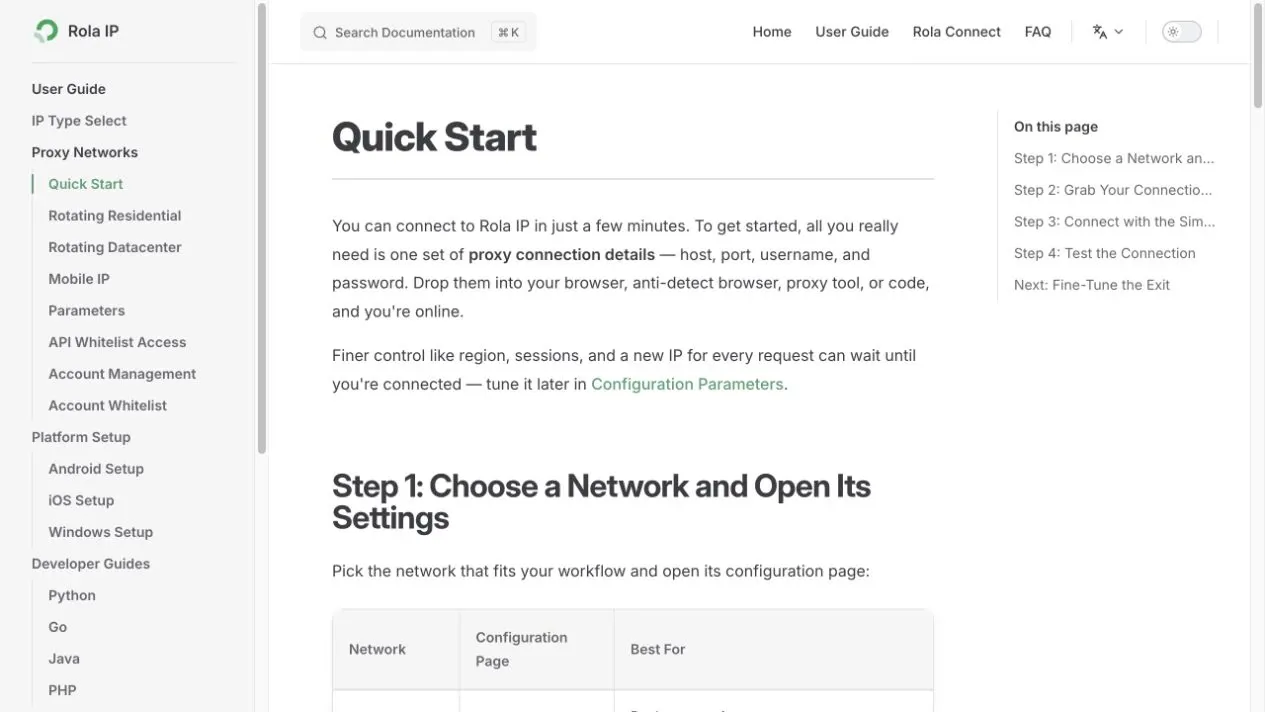
Figure 5: The proxy-generation and usage entry point in Rola IP’s English Quick Start documentation.
Step 3: Write Credentials Into Environment Variables
macOS or Linux terminal:
export ROLA_PROXY_HOST="your-rola-host"
export ROLA_PROXY_PORT="your-rola-port"
export ROLA_PROXY_USERNAME="your-rola-username"
export ROLA_PROXY_PASSWORD="your-rola-password"
export TARGET_URL="https://httpbin.org/ip"
Windows PowerShell:
$env:ROLA_PROXY_HOST = "your-rola-host"
$env:ROLA_PROXY_PORT = "your-rola-port"
$env:ROLA_PROXY_USERNAME = "your-rola-username"
$env:ROLA_PROXY_PASSWORD = "your-rola-password"
$env:TARGET_URL = "https://httpbin.org/ip"
Environment variables are easier to clean up when they only apply to the current terminal session. In CI/CD, use a secret manager instead — don’t commit passwords to Git, screenshots, or logs.
Step 4: Run the Complete Python Requests Proxy Example
The script below checks the required variables, URL-encodes reserved characters like @, :, and / in the username and password, and performs a status check on the response.
import json
import os
from urllib.parse import quote

import requests


def require_env(name: str) -> str:
    value = os.getenv(name)
    if not value:
        raise RuntimeError(f"Missing required environment variable: {name}")
    return value


def proxy_url(scheme: str = "http") -> str:
    username = quote(require_env("ROLA_PROXY_USERNAME"), safe="")
    password = quote(require_env("ROLA_PROXY_PASSWORD"), safe="")
    host = require_env("ROLA_PROXY_HOST")
    port = int(require_env("ROLA_PROXY_PORT"))
    return f"{scheme}://{username}:{password}@{host}:{port}"


proxies = {"http": proxy_url(), "https": proxy_url()}
response = requests.get(
    require_env("TARGET_URL"),
    proxies=proxies,
    timeout=(10, 30),
)
response.raise_for_status()
print(json.dumps(response.json(), indent=2))
Save it as requests_rola_http.py and run it:
python requests_rola_http.py
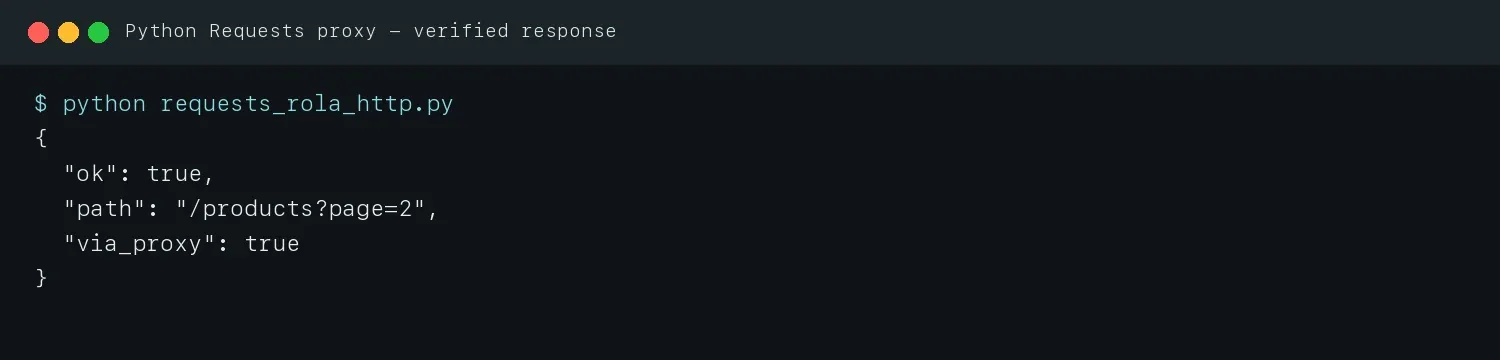
Figure 6: The actual output of the same core script passing through the local authenticated proxy fixture; via_proxy: true proves the request went through the test proxy.
Figure 6 verifies the code’s authentication, forwarding, response parsing, and exception-handling chain. Since this article doesn’t embed the reader’s own commercial credentials, the final Rola IP public exit, region, and ASN still need to be run and verified using your own endpoint.
How Should You Handle Python Requests Proxy Authentication?
The most reliable approach to Python Requests proxy authentication is to put the percent-encoded username and password into the proxy URL — not to pass the proxy credentials to the target site’s auth= parameter.
The correct structure is:
http://encoded_username:encoded_password@proxy_host:proxy_port
requests.get(url, auth=(user, password)) sets HTTP authentication for the target server — not proxy authentication. If proxy credentials containing @ or : aren’t encoded, the URL parser will mistake them for delimiters, which is why the example uses the Python standard library’s quote(value, safe="").
| Situation | Correct Handling |
|---|---|
| Username or password contains reserved characters | Use quote(..., safe="") on each separately |
| Using username/password authentication | Put credentials into the proxy URL |
| Using IP whitelisting | The proxy URL can omit credentials, but the client’s outbound IP must already be authorized |
| Also accessing an API that needs Basic Auth | Put proxy credentials in the proxy URL, and the target API’s credentials in auth= |
Rola IP’s field structure and Python example can be found in the English Python proxy integration documentation. When copying configuration, don’t mix endpoints generated from different products, regions, or session generators.
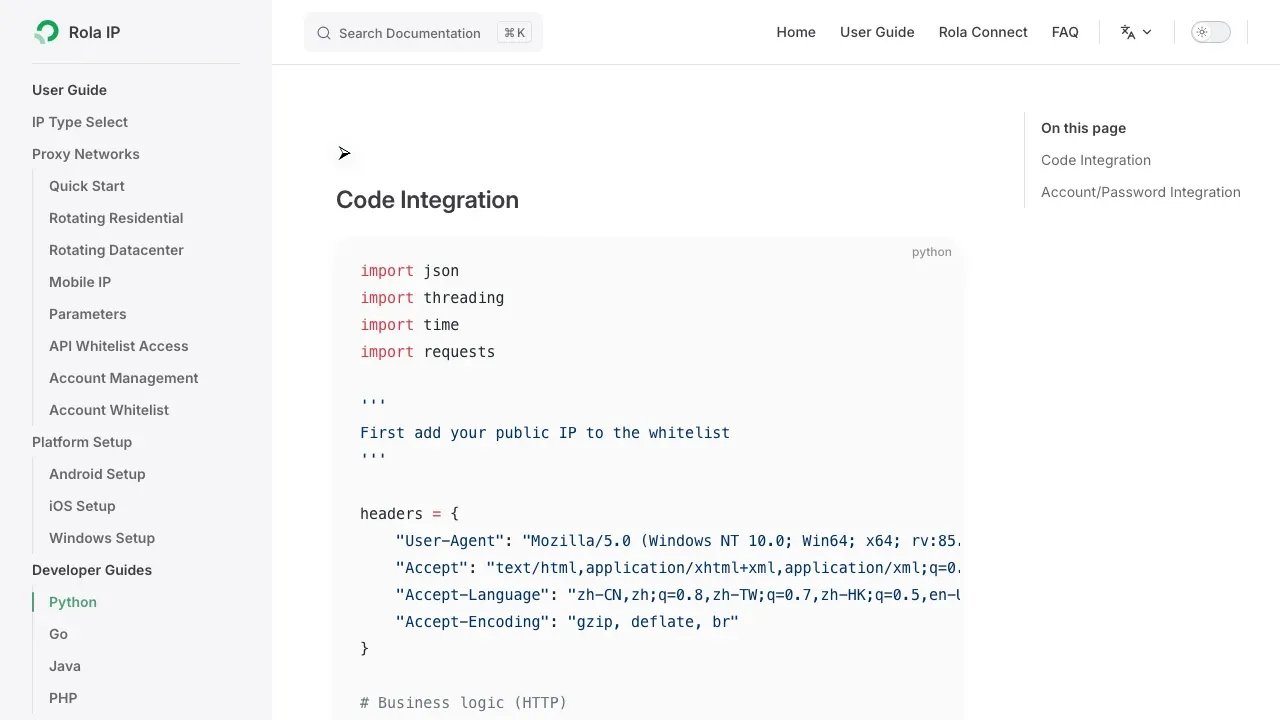
Figure 7: Rola IP’s English Python Integration documentation, showing where the code integration goes.
How Do You Confirm a Python Requests Proxy Actually Took Effect?
Don’t just look at HTTP 200 — also verify the exit identity, the business target’s response, and session behavior across repeated requests.
It’s recommended to check in this order:
- Request an IP-check endpoint once without a proxy, and log the baseline exit.
- Request the same endpoint using the proxy, and confirm the IP has changed.
- Check whether the country, city, ASN, and network type match the generation parameters.
- Request a real business URL, and confirm the status code, response body, and key fields are valid.
- Send 3–5 consecutive requests, and determine whether the exit rotates per request or stays sticky per session.
- Log the proxy status, target status, elapsed time, and request ID, to avoid mistaking a target-site 403 for a proxy connection failure.
A public IP echo service suits verification during development, but it shouldn’t become a hard dependency for production scraping. Production systems can sample-verify at startup or during a health check, and should tolerate changes in response format.
Alternative Proxy Configuration Methods
Beyond request-level proxies=, Requests also supports system environment variables and SOCKS5; choose based on your deployment boundary and DNS requirements — don’t mix multiple sources.
How Do You Set a Python Requests Proxy Environment Variable?
Requests can read HTTP_PROXY, HTTPS_PROXY, ALL_PROXY, and NO_PROXY, which suits uniformly configuring command-line tasks, but an explicit proxies= is easier to audit for a single request.
macOS or Linux example:
export HTTP_PROXY="http://username:password@host:port"
export HTTPS_PROXY="http://username:password@host:port"
export NO_PROXY="localhost,127.0.0.1,.internal.example"
python app.py
At this point, the application code doesn’t need to pass proxies:
import requests

response = requests.get("https://httpbin.org/ip", timeout=(10, 30))
response.raise_for_status()
print(response.json())
Three priority issues are worth watching for:
- A leftover proxy variable on the operating system can affect test results; when troubleshooting, first run
env | grep -i proxy. Session.proxiescan be overridden by environment settings; for critical requests, passingproxies=directly is clearer.- If you must prevent a Session from reading environment proxies, you can set
session.trust_env = False, but this also affects environment settings like.netrcand the CA bundle, so evaluate it first.
On a shared server, container, or in CI, environment variables can be exposed by process-inspection tools or error logs. Sensitive proxy credentials should be injected by runtime secrets, and redacted from output.
How Do You Configure a Python Requests SOCKS5 Proxy?
Install Requests’ SOCKS extra dependency, and prioritize using socks5h:// to have DNS resolution happen on the proxy side.
The official Requests SOCKS documentation clearly distinguishes: socks5:// resolves DNS on the client, and socks5h:// resolves DNS on the proxy server. If the task requires the target domain resolution to also follow the proxy exit, using socks5h better matches that expectation.
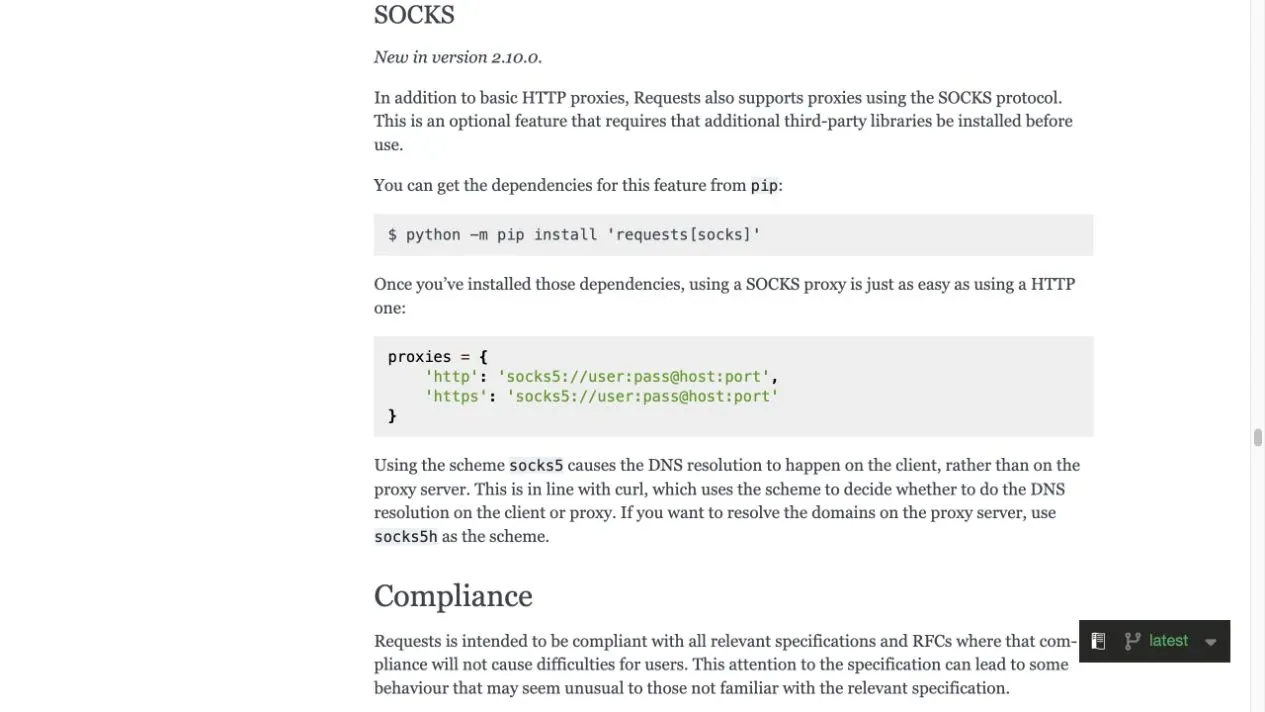
Figure 8: The official Requests SOCKS documentation, explaining the dependency installation and the DNS difference between socks5 and socks5h.
First install the dependency:
python -m pip install "requests[socks]"
Then use the following script:
import os
from urllib.parse import quote

import requests

username = quote(os.environ["ROLA_PROXY_USERNAME"], safe="")
password = quote(os.environ["ROLA_PROXY_PASSWORD"], safe="")
proxy = (
    f"socks5h://{username}:{password}@"
    f"{os.environ['ROLA_PROXY_HOST']}:{int(os.environ['ROLA_PROXY_PORT'])}"
)

response = requests.get(
    os.environ["TARGET_URL"],
    proxies={"http": proxy, "https": proxy},
    timeout=(10, 30),
)
response.raise_for_status()
print(response.text)
Before using this, confirm the current Rola IP product endpoint supports the chosen protocol; the proxy protocol support page can be used to check this. HTTP and SOCKS5 are client connection methods — you shouldn’t infer the exit IP type or anonymity level just from the protocol name.
Sessions, Rotation, Timeouts & Retries
A stable production proxy workflow needs to handle connection reuse, exit rotation, sticky sessions, timeouts, and limited retries at the same time — but these mechanisms solve different problems.
What’s the Difference Between a Session, Rotating IPs, and Sticky Sessions?
A Requests Session reuses the client’s connection pool and cookies, while a proxy’s sticky session controls the exit IP’s lifecycle — these are not the same concept.
requests.Session() reduces the overhead of repeated TLS and TCP connection setup, and preserves cookies within the same Session. Rola IP’s rotation or sticky parameters decide how the proxy gateway chooses the exit. One Requests Session can still use a rotating exit; multiple Requests Sessions can also get the same exit due to a shared sticky identifier.
| Goal | Recommended Strategy |
|---|---|
| A large number of unrelated public URLs | Rotating exit + Session connection pooling |
| Pagination or multi-step regional verification | Sticky session + the same cookie Session |
| Fixed allowlist testing | Static exit + Session connection pooling |
| Concurrent collection | An independent Session per worker — don’t share mutable state across threads |
Don’t randomly swap the entire proxy list before every request while ignoring connection reuse. A better approach is to let the proxy gateway rotate according to product rules, and set a limited retry count with backoff for failed requests.
How to Rotate Rola IP Proxies with Python Requests
When using Rola IP’s rotating residential endpoint, the application usually just needs to repeatedly request the same gateway — the server side decides, based on the endpoint parameters, whether to change the exit each time or keep a sticky IP.
The code below doesn’t maintain a proxy IP list in source code — it repeatedly requests the same Rola IP gateway. After setting TARGET_URL to an IP-check endpoint that returns JSON, you can compare the exit address in each response.
import os
from urllib.parse import quote

import requests


username = quote(os.environ["ROLA_PROXY_USERNAME"], safe="")
password = quote(os.environ["ROLA_PROXY_PASSWORD"], safe="")
proxy_url = (
    f"http://{username}:{password}@"
    f"{os.environ['ROLA_PROXY_HOST']}:{int(os.environ['ROLA_PROXY_PORT'])}"
)
proxies = {"http": proxy_url, "https": proxy_url}

with requests.Session() as session:
    for request_number in range(1, 4):
        response = session.get(
            os.environ["TARGET_URL"],
            proxies=proxies,
            timeout=(10, 30),
        )
        response.raise_for_status()
        print(f"Request {request_number}:", response.json())
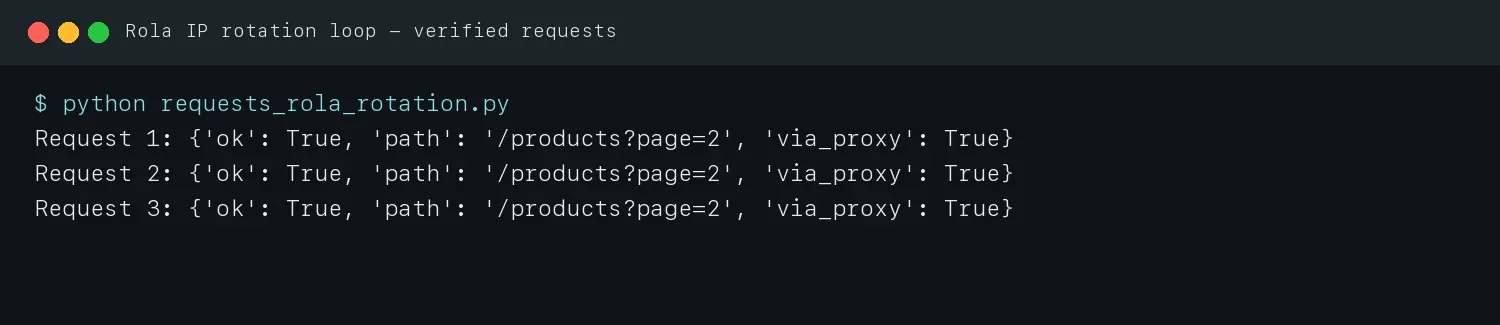
Figure 9: The actual execution result of the rotation loop; all three requests went through the local authenticated proxy test chain.
The local fixture can only confirm the loop, authentication, Session, and response parsing all execute correctly — it doesn’t claim to simulate Rola IP’s real address pool. In production, per-request rotation should produce different exits, and a sticky session should keep the same exit within its set duration. If the three results don’t match expectations, go back to the dashboard and check the rotation or session parameters in the generator.
Maintaining a DIY list of multiple independent proxy URLs suits teams that already have a multi-endpoint inventory, but they must handle health checks, cooldowns, load balancing, and credential protection themselves. For Rola IP’s gateway-based rotation, don’t randomly disassemble or rewrite the vendor-generated username parameter on the client side.
How Do You Configure Timeouts, Retries, and Connection Pooling for a Python Requests Proxy?
Production requests should set a connection timeout, a read timeout, retries for idempotent methods, and a connection-pool cap — and shouldn’t retry every error indefinitely.
Requests doesn’t set a timeout automatically by default. timeout=(10, 30) represents the wait ceiling for the connection phase and the read phase respectively — it isn’t an absolute total duration for the entire download. The urllib3 Retry API can supply a status-code, method, and backoff strategy to Requests’ HTTPAdapter.
import os
from urllib.parse import quote

import requests
from requests.adapters import HTTPAdapter
from urllib3.util.retry import Retry


def proxy_url() -> str:
    username = quote(os.environ["ROLA_PROXY_USERNAME"], safe="")
    password = quote(os.environ["ROLA_PROXY_PASSWORD"], safe="")
    return (
        f"http://{username}:{password}@"
        f"{os.environ['ROLA_PROXY_HOST']}:{int(os.environ['ROLA_PROXY_PORT'])}"
    )


retry = Retry(
    total=4,
    connect=3,
    read=2,
    status=3,
    backoff_factor=0.5,
    status_forcelist=(429, 500, 502, 503, 504),
    allowed_methods=frozenset({"GET", "HEAD", "OPTIONS"}),
    respect_retry_after_header=True,
)

with requests.Session() as session:
    adapter = HTTPAdapter(
        max_retries=retry,
        pool_connections=10,
        pool_maxsize=10,
    )
    session.mount("http://", adapter)
    session.mount("https://", adapter)
    proxies = {"http": proxy_url(), "https": proxy_url()}
    response = session.get(
        os.environ["TARGET_URL"],
        proxies=proxies,
        timeout=(10, 30),
    )
    response.raise_for_status()
    print(response.text)
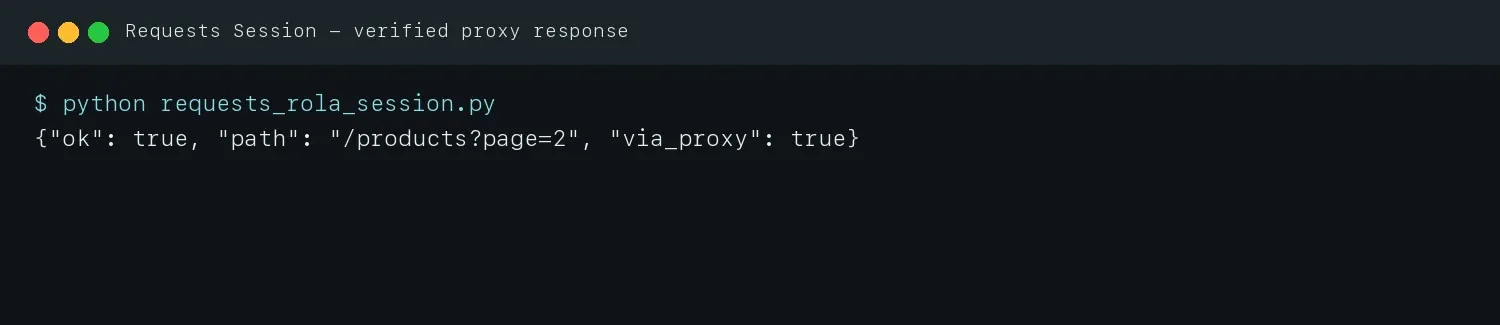
Figure 10: The actual successful output of the combined Session, HTTPAdapter, and Retry example.
It’s safer to only auto-retry idempotent methods like GET, HEAD, and OPTIONS. For requests that could have side effects — POST, payments, form submissions — don’t simply replay them unless the business interface provides an idempotency key. Identity or permission errors like 407, 401, and 403 also shouldn’t be retried blindly.
Troubleshooting Python Requests Proxies
Troubleshooting should follow the order “did it go through the proxy → can it connect to the gateway → did the proxy accept authentication → did the target accept the request.”
How Do You Fix “407 Proxy Authentication Required” in Python Requests?
A 407 means the request reached the proxy, but the proxy didn’t accept the current authentication — check credentials and the authentication mode first, rather than immediately changing the User-Agent.
Troubleshoot in this order:
- Confirm the Host and Port come from the same Rola IP endpoint.
- Confirm the username and password don’t contain extra spaces or line breaks left over from copying.
- URL-encode the username and password separately.
- Confirm whether you’re using credential authentication or IP whitelisting, and avoid mixing the two modes.
- Check whether the account, plan, traffic, and endpoint are still valid.
- Temporarily remove the system-level HTTP_PROXY and HTTPS_PROXY, to rule out an old configuration overriding it.
- Reproduce it with a minimal IP-echo request, then go back to the business URL.
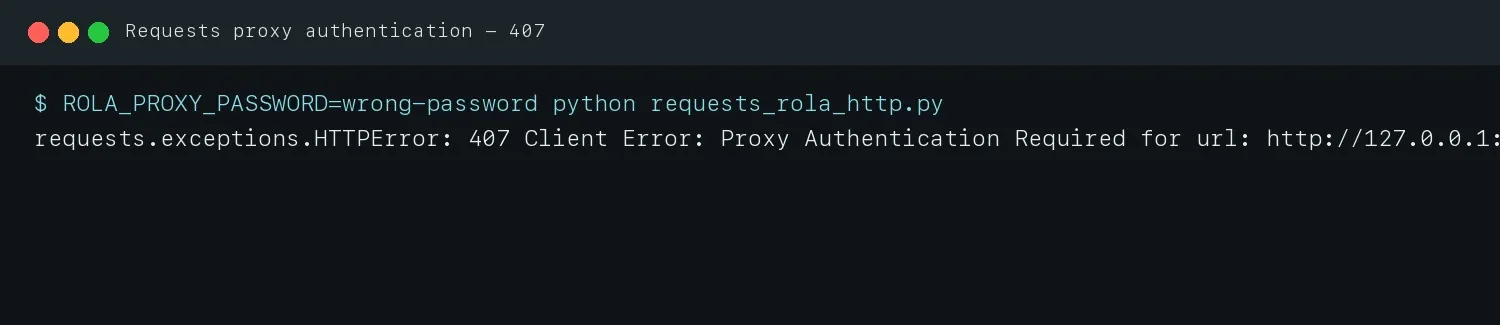
Figure 11: The real “407 Proxy Authentication Required” obtained by running the same script with an incorrect password.
Figure 11 is a genuine HTTP 407 returned by the local authenticated proxy — it isn’t manually assembled text. It verifies that Requests explicitly raises a proxy-authentication error at raise_for_status(), making it easy to distinguish it from a target site’s 401 or 403 in the logs.
How Do You Locate Common Python Requests Proxy Errors?
Judging first whether the failure happened at the DNS, proxy-connection, TLS, proxy-authentication, or target-response layer can significantly shorten troubleshooting time.
| Error or Status | Common Cause | First Thing to Check |
|---|---|---|
| ProxyError | Wrong host/port, an unreachable gateway, or a wrong protocol | Endpoint, scheme, network firewall |
| ConnectTimeout | Couldn’t establish the proxy connection in time | Gateway reachability, connect timeout, concurrency |
| ReadTimeout | Connected, but the target responded too slowly | Read timeout, target load, response size |
| 407 | Proxy credentials or whitelist failed | Username/password encoding, auth mode, plan status |
| 401 | The target site requires authentication | The target site’s token or auth= |
| 403 | The target site rejected the current request | Permissions, rules, frequency, request context |
| 429 | Request frequency exceeded the target’s limit | Lower the rate, respect Retry-After |
| SSLError | A CA, TLS intermediate proxy, or system certificate issue | CA bundle, system time, proxy protocol |
Don’t use verify=False as a long-term fix — it disables TLS certificate verification and hides man-in-the-middle risk. When an enterprise proxy uses a custom CA, have your operations team provide a trusted certificate bundle, and configure it explicitly through REQUESTS_CA_BUNDLE or verify="/path/to/ca.pem".
Production Design and Verification
A production system should layer proxy configuration, network transport, result verification, and business parsing, and use automated tests to make sure critical error paths are reproducible.
How Do You Design a Maintainable Python Requests Proxies Architecture?
Only by layering configuration, network strategy, request execution, verification, and business parsing can you quickly locate responsibility boundaries when the proxy or the target site changes.
It’s recommended to split it into five layers:
- Configuration layer: reads the endpoint from a secret manager — doesn’t save passwords in source code.
- Proxy layer: generates the encoded HTTP or SOCKS5 URL.
- Transport layer: manages the Session, timeouts, retries, and connection pool.
- Verification layer: logs the exit, status code, elapsed time, and retry count.
- Business layer: parses page or API data, and checks result completeness.
In a concurrent program, don’t share a single continuously-mutated Session globally. You can create an independent Session per thread or worker; if you need higher-concurrency async I/O, consider aiohttp or httpx instead of unboundedly scaling blocking Requests across threads.
How Was This Article’s Code Verified?
This article ran reproducible tests against the main HTTP proxy flow, and kept a clear boundary around the parts that require commercial credentials.
The test fixture starts a target service and an HTTP proxy requiring Basic authentication on 127.0.0.1, then uses the article’s scripts to complete the following assertions:
- Correct credentials pass through the proxy and return
via_proxy: true. - Incorrect credentials get a genuine 407 error.
user@example.comandp@ss:wordare correctly encoded.- The Session, HTTPAdapter, and Retry version runs and returns a response successfully.
- The Basic setup, HTTP, Session, rotation, and SOCKS5 files all pass a Python compilation check.
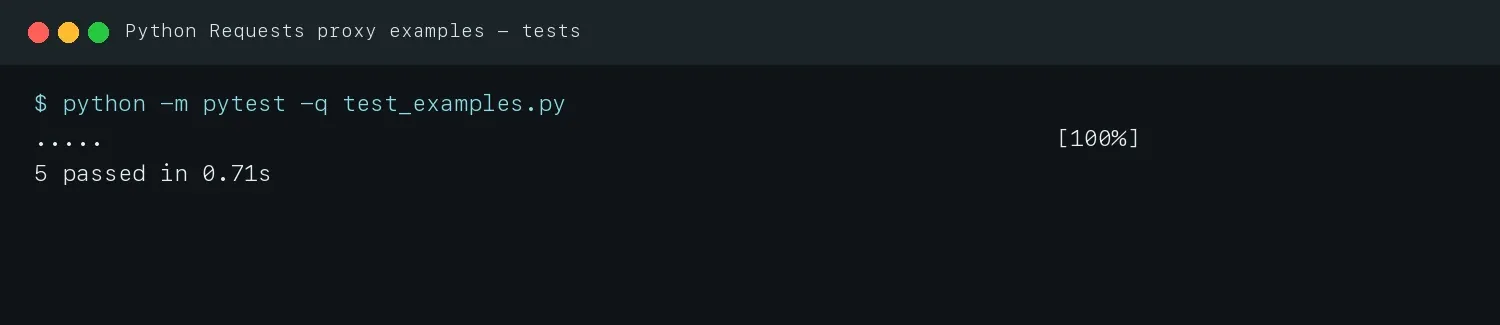
Figure 12: Automated tests covering successful authentication, basic setup, repeated requests, 407 failure, and special-character encoding.
The SOCKS5 example has passed a syntax and dependency-loading check, but the complete SOCKS5 network handshake and Rola IP’s actual country, city, and ASN results require a valid Rola IP endpoint to verify. This distinction prevents “the code can be imported” from being mistakenly written up as “the commercial network has been tested live and works.”
Pre-Launch Checklist
Before going live, confirm at least eight areas: permissions, endpoint, authentication, timeouts, retries, verification, logging, and credential management.
- You have authorization to access the target data, and comply with the terms of service, robots.txt, and rate requirements.
- The Rola IP network type, region, and session strategy match the business goal.
- Both
httpandhttpstargets are explicitly mapped to the proxy. - Username and password are encoded, and logs don’t output the complete proxy URL.
- Every request has a connect and a read timeout.
- Limited retries are only applied to appropriate methods and status codes.
- Results are verified using exit information and business fields — not just checking for 200.
- CI/CD uses secrets, credentials are rotated regularly, and access is restricted.
Conclusion
A robust Python Requests proxy setup combines correct proxy mapping, encoded authentication, explicit timeouts, bounded retries, exit verification, and a network product that matches the task.
Rola IP can serve as Requests’ network exit layer, but stable results still depend on choosing the right product, region and session parameters, target-site permission, and client request strategy. Confirm the connection first with a minimal IP-echo example, then add the Session, retries, and business parsing — this makes every step verifiable, debuggable, and maintainable.